
The Ooni Volt 12 is an excellent oven for making Neapolitan-style pizza at home (here’s my in-depth review, which includes temperature readings, advice on how to avoid issues when launching the pizza, and more). However, if you’re using it indoors, which I assume many Ooni Volt owners will, then making sure you don’t set off your smoke alarm or smoke out your family/guests becomes very important. Unfortunately, most pizza recipes from Ooni are intended for the outdoor only ovens where a little extra smoke isn’t an issue. Since I couldn’t find a good recipe tailored specifically to the Ooni Volt 12, I decided to create my own. I customized and tested several interations of this recipe to avoid smoke and other issues, while still producing optimal results in an Ooni Volt 12. For my disclosures see this page.
The Issue with Most Recipes
Generally, higher-hydration doughs produce better pizzas, but they also make it harder to get the pizza off the peel and into the Volt 12’s small opening. One way to get a high-hydration dough off the peel is to add extra semolina and flour to the bottom. Outdoors, this method works pretty well. Indoors, it will generate excessive smoke and likely set off your smoke alarm and leave you and anyone else in the home coughing. Once I identified this problem, I tested several variations to find a hydration that results in an excellent finished pizza, while remaining reasonably easy to work with.
Notes on This Recipe
Practice Launching. If you haven’t launched a pizza from a peel yet, it’s worth practicing with your peel and a cold Ooni Volt 12. I found that a silicon potholder comes reasonably close to approximating a pizza but work with what you have and get comfortable sliding it off and into the oven. I do recommend practicing in the actual oven because, given the fairly narrow opening, the angle you can put the peel at when launching is limited, which makes it harder to launch.
Take Steps to Reduce Sticking. One of the worst things that can happen is having the pizza stick to the peel — either you won’t be able to launch it at all or it will fold and/or the toppings will come off the pizza and end up on your stone. So, check out my tips to reduce the chances of having your pizza stick to the peel.
Less Hydration Makes Pizza Making Easier. If you’re new to launching from a peel, you could also try making at a lower hydration dough. For that, I’d recommend reducing the water in this recipe to 325 grams. This will give you a hydration of 50% and make your dough less sticky and easier to work with.
Watch Closely. The most surprising thing for me when I first started using the Volt 12 was how fast the pizza cooked. With your home oven, minutes matter. With the Volt 12, a few seconds can be the difference between perfection and a burned pizza. (see below)
Less Yeast. This recipe uses way less yeast than you’ll see in most recipes. This has two benefits. It allows you to keep the dough for an extended period of time without having to worry it will overproof and it creates an easier to digest dough.
Use 00 Flour. If you want to get as close as possible to Neapolitan-style pizza, you have to use 00 flour. I’ve compared several and my personal favorite is Anna Tipo 00 Flour, which multiple grocery stores near me carry. You’ll see a lot of people prefer Caputo Blue or Red, but in multiple side-by-side comparisons, I found that Anna flour produces a more flavorful dough and better texture, with the slightest outer crisp layer and a soft and tender interior. That said, Caputo Blue and Red or any 00 flour should work well for this recipe. If you can’t find 00, I would go with bread flour, but, truthfully, you won’t produce Neapolitan-style pizza with bread flour.
Use a scale. Ideally, use two — one to weigh the flour and water and a second, more sensitive, one to handle salt and yeast. I don’t think they sell the larger scale I use anymore. For small amounts, I use this one, which is very accurate but only useful for minuscule amounts. If I had another chance, I might get dual scale, like Ooni’s Dual Platform Scale or Kitchen Aid’s. Of course, we don’t live in an ideal world, so don’t let lack of equipment stop you. I provide alternative amounts if you’re scaleless.
Weigh Dough Balls or Not. If you want, you can weigh the dough balls to be certain they are all the same size, but it doesn’t bother me if I end up with slightly smaller and larger dough balls. If you weigh, each ball should be 270–275 grams.
The Process Matters. This recipe has lots of detailed steps. The process matters just as much as the ingredients, so stick with me and read the entire recipe.
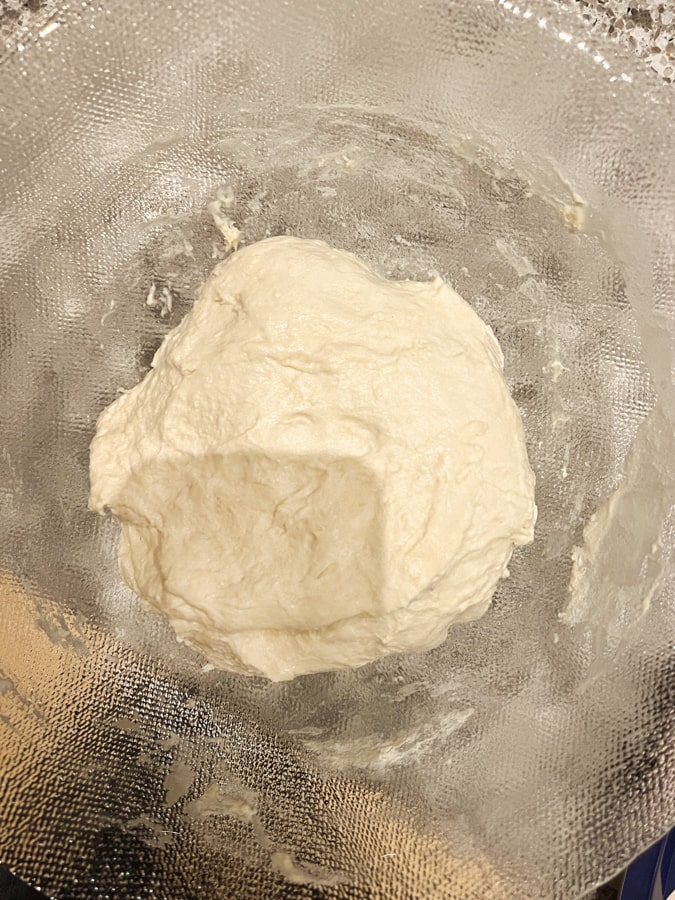
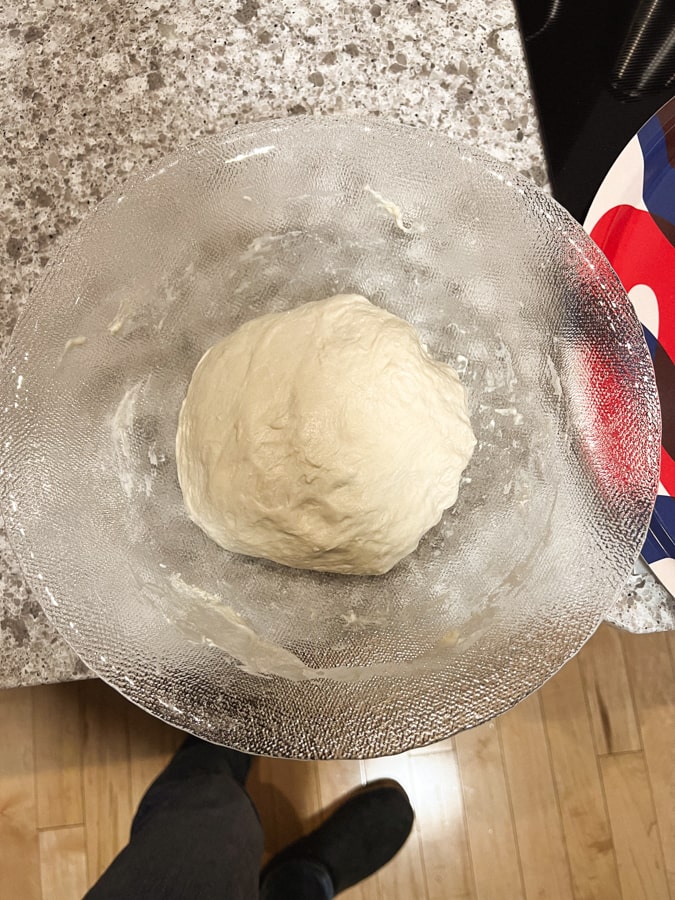
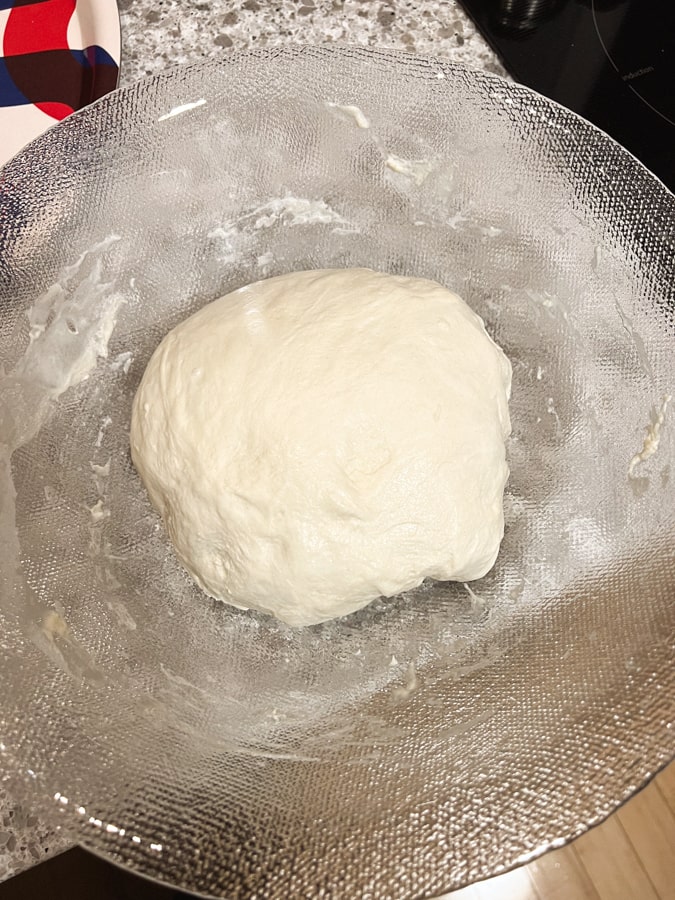
Fold Instead of Knead. I’m busy and you probably are too, so I did everything I could to reduce the active time for this recipe. There’s minimal kneading and you can do what little there is in the bowl, saving you from cleaning a counter. Instead of kneading, the recipe relies on stretching and folding the dough to develop gluten. Stretching instead of kneading saves time, reduces mess, and creates a more airy and delicate dough. Also, by wetting your hands between folds (instead of flouring them), you won’t incorporate additional flour into the dough, inadvertently drying it out. Below is the progression of the dough over the course of the four folding sessions the recipe calls for.
Pre-Bake Rise. The most important rise occurs when you take the dough out of the refrigerator before cooking. Make sure you leave yourself plenty of time to remove the dough and let it rise again before cooking.
It Gets Hot. Be careful — the Ooni Volt 12 gets extremely hot!
The Recipe
Ingredients (makes four 12 inch pizzas)
Water: 400 grams (just over 1 3/4 cups)
Yeast: 0.374 grams (approximately 1/8 teaspoon) See note above on scales capable of measuring fractions of a gram.
00 Flour: 650 grams (a little over 4 cups) See note above on flour preferences and importance of using 00.
Salt: 17 grams (roughly 3 1/2 teaspoons coarse sea salt) If you are not weighing your salt, I strongly recommend Googling for a conversion from grams to teaspoons based on the type of salt you have — salt volume varies greatly by brand.
Steps / Process
- Pour the water into a large bowl. Sprinkle the yeast over the water and stir it for a minute or two to semi-dissolve the yeast.
- Add the flour to the yeast-water mixture. Put the salt on top of the flour. Mix the ingredients together with a large metal or wooden spoon. Stir until things are just coming together, about 30 seconds to a minute.
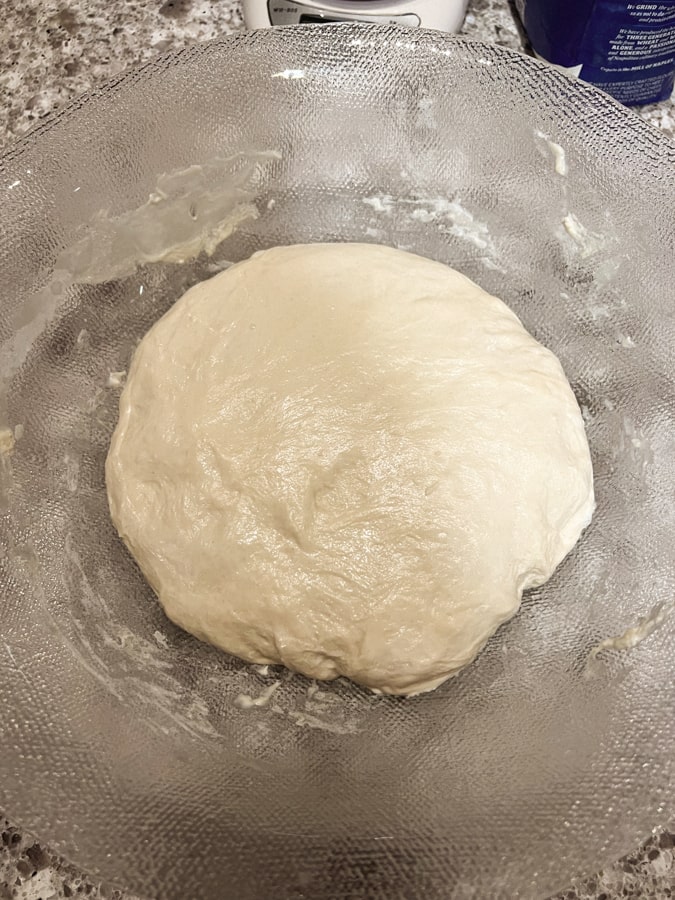
- Wet your hands with water (reduces dough sticking to your hands) and knead the mixture for one minute. (I leave the dough in the bowl to minimize mess — this is just a light knead to bring everything together.) When you’re done, all the flour should be incorporated into the dough with no dry spots. [image and description of finished dough]
- Wet your hands and reach under the bottom of one edge of the dough mass and stretch the dough up. Fold the dough you’ve stretched over the top of the larger dough mass and repeat the stretch and fold process 4–6 times until you’ve gone all the way around the dough mass.
- Flip the dough over so that the side with the folds is on the bottom of the bowl and cover the bowl with plastic wrap or a plate.
- Set a timer for 15 minutes. When the timer goes off, wet your hands and repeat the stretch and fold process. Continue doing stretch and fold sessions at 15 minute intervals until you’ve done four total stretch and fold sessions. You’ll be surprised how much the dough will change over the course of the folding sessions. See the above images showing the dough going from rough to smooth and glossy.
- Cover the bowl with plastic wrap or a plate and let it rise for 20 minutes to 2 hours. (If your pressed for time, you can skip this step and proceed straight to the next one with minimal impact on the final product — the dough has had some time to rise time between the stretching and folding sessions.)
- Lightly flour your work surface and hands, then carefully ease the dough out of the bowl and form it into a square or rectangle. (You want to keep air in the dough by being gentle when handling it.) Cut the dough into four equal sized pieces using a bench scraper, metal spatula, or knife. Form the dough into balls. If you’ve never done this before, this video is helpful or you can Google for another.
- Put the dough balls in separate bowls and cover each with plastic wrap, or, if you have glass containers with lids, put the dough balls containers. (I’ve found that these ones from IKEA work great.) Leave the dough in the refrigerator anywhere from 12 hours to 5 days. How long you leave the dough in will impact the flavor and texture. You’ll get more flavor the longer you leave it in but the dough will also become more fragile and less elastic, making it more susceptible to tearing. I think the sweet spot is 2–3 days but experiment and see what works for you.
- Two to three hours before you plan to make pizza, remove the dough from the refrigerator, and, keeping it in the covered containers, let it rise at room temperature. How long before cooking you need to let the dough balls rise depends on your room temperature. At 65° F / 18.3° C, you’ll need three hours. If your house is warmer, you can get away with a shorter pre-bake rise.
- Twenty to 30 minutes before you plan to cook the pizzas, turn on your Ooni Volt 12. About 10 minutes after starting the Ooni, begin to stretch your first pizza. First, make a small mound of flour where you plan to stretch it. Then, flour your hands and carefully ease the dough ball out of the container into the flour mound. Flip the dough to cover the other side in flour and roll the edges of the dough ball in the flour so that it is completely covered. (This is important to reduce the chances of the finished pizza sticking to your peel, see my tips for more on how to reduce sticking.)
- Keeping the dough ball in the flour, press your fingers in the middle and work out to the edge leaving a roughly half-inch border untouched around the entire pizza. This will seem too small, but you’ll be surprised how much it expands once you cook it.
- Being careful to avoid touching the outer rim, lift the dough out of the flour and gently shake off any excess. Set the dough down on a clean surface, making sure to keep the bottom in contact with the counter. By pressing this side into the flour, you’ve added additional flour to it, so you want to make sure it the floured side remains on the bottom throughout the rest of the process.
- Stretch the dough until it’s just translucent in some areas. You can stretch however you feel comfortable. Here’s a video showing my favorite technique. Note that here I left the outer rim thicker than I should have.
- Once you have the dough stretched, lay it flat and add your toppings. You want to top it as quickly as possible because the longer its in contact with the counter or table, the more likely it is to stick.
- Sprinkle a little semolina onto your pizza peel. (Less is more here because any excess semolina will burn and smoke.) Use both hands to gently drag your pizza onto the peel. Getting it to the peel will likely distort the shape and shift the toppings, so do your best to quickly stretch it back out and adjust the toppings. Again, you want to move quickly here — the less time your pizza sits on the peel, the better.
- Lift up the peel and gently move it back and forth. If the pizza isn’t sliding easily on the peel, check to see where it’s sticking and lift up that part of the pizza to put a little more semolina underneath.
- Transfer the pizza to the Volt 12. It’s hard to describe how to use the peel, so I think watching videos of others and practicing is the best way to go. My one tip is to think about pulling the peel out from under the pizza, like a table cloth from under dishes.
- Watch the pizza very closely and once you see the back crust has risen up, open the door and rotate the pizza 180 degrees so that the area at the front now faces the back. I have used a set of metal tongs to grab the edge of the crust and rotate, but a turning peel is much easier and safer and won’t damage the crust. I got a peel and haven’t looked back. Here’s a great video showing how to use the peel.
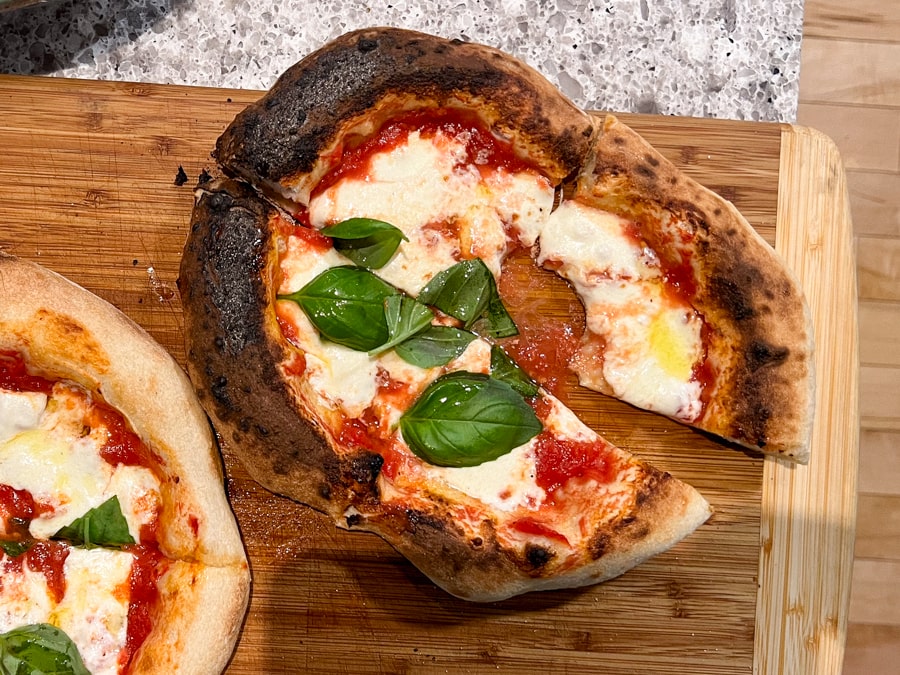
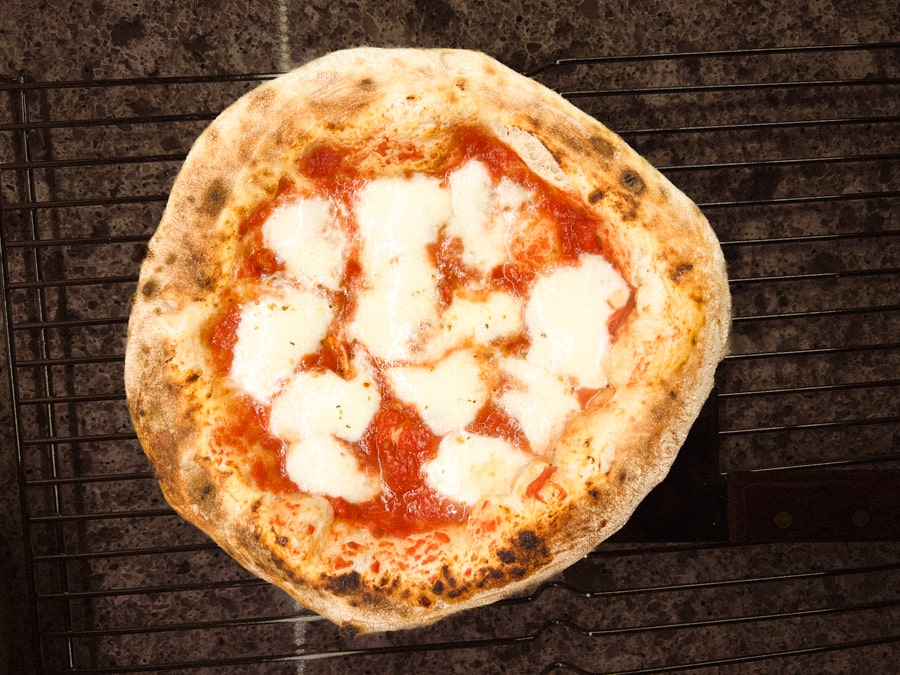
- In 90 seconds to 2 minutes, the pizza should be ready to pull out. Slide your peel under it and take it out. I like to let it cool on a cooling rack for a few minutes before transferring to a cutting board and slicing. Don’t wait too long though — the pizza is best fresh! If the pizza is sticking to the stone, try using tongs to grab the crust and carefully pull it onto the peel. Remember to be careful — it’s hot!