I made my first pizza around age 10 in our brand new microwave oven. For most of my life, my Mom made pizza every week, and my brothers and I sometimes helped top the pizzas. Given our competitive nature, this quickly developed into pizza competitions, where we competed for the best topping combos.
I didn’t start making my own pizza until my wife and I moved to Osaka, Japan. Osaka had pizza. You could even get it delivered, usually in a heated case on the back of a scooter. And, for our first few months in Japan, we regularly drowned our pizza cravings at Shakey’s, an all-you-can-eat pizza place that originated in the US and migrated to Japan. But, the pizza at Shakey’s was mediocre. The delivered pizza tended to be better but was expensive for two English teachers, and it didn’t taste like the pizza we were used to anyway. So, I decided to start making my own pizza.
My brother had given me the California Pizza Kitchen Cookbook, so I started with that dough recipe. Our kitchen, like most in Japan, didn’t have an oven. So, I made pizza in a small toaster oven on our kitchen table. It turned out surprisingly well, all things considered — definitely better than Shakey’s.
After we got back from Japan, I didn’t really make pizza again until about a year into COVID, when yeast and flour again became readily available again, and I got bored with my other cooking experiments. Most of my hobbies come and go quickly, so I didn’t want to invest a lot in pizza equipment upfront. That led me to learn how to use what I already had in my kitchen — knowledge I pass on below.
This post summarizes everything I’ve picked up so far on how to make pizza in a home oven. Before I get into the details, I’ll share an encouraging quote from Peter Reinhart, “…pizza is such a perfect food that, unless you burn it, it is nearly impossible to screw it up.”* So, with that in mind, here’s what I know.
*The context of that quote is that his book isn’t about making good pizza, because good pizza is easy to make, his book is instead about making great pizza. I cut the rest of the quote because if you're new to making pizza from scratch, you might feel intimidated. Don’t. Pizza truly is such a perfect food that you’re very likely to be successful — even more likely if you follow the tips on this page.
Making Your Own Pizza Dough Is Worth It
I can’t deny that buying and topping a pre-made pizza crust is fun and easy. It also doesn’t take much time or effort and still allows for plenty of opportunities to show your creativity through the toppings. If you only have time or energy for store bought crust, go for it! A pro tip if you do go this route: find a local pizzeria that will sell you their dough. The dough from your local pizzeria will probably be much fresher and better than what you can get in the grocery store.
But, if you really want great pizza at home you should make your own dough. What you buy in the grocery store just isn’t the same, and, while you can get excellent dough from local pizzerias, going that route leaves you with few options — you’ll need to make whatever kind of pizza the shop makes. Making your own dough gives you a level of control that you can’t get with doughs you buy elsewhere — maybe you want to try Detroit-style pizza but your local pizzeria specializes in Neapolitan. Plus, if you make your own dough, you get to watch its journey from lifeless blob to bubbling yeasty culture of goodness.
Because my mom always made the dough from scratch, I never felt very intimidated by making the dough. The truth is no one should be. Making a basic pizza dough from scratch isn’t hard. You’ll get satisfaction, impress your peers, delight your guests, and so much more. What are you waiting for? Make some pizza!
…Or keep reading for more details on making pizza at home.
Pizza Styles
Some pizzas do better in home ovens than others. I’ll start off with a list of popular pizza styles before getting into details on the benefits and challenges of making various styles at home. Broadly speaking, I’d say there are two main pizza categories: pan pizza and hand-tossed pizza or hand-shaped pizza. As you’d guess, you make pan pizzas in a pan, while you shape hand-tossed pizzas by, wait for it, hand. The name “hand-tossed pizzas” implies tossing the dough and spinning it to shape them, but I am calling hand-tossed pizzas any that you shape yourself without the aid of a pan to guide the shaping. (Maybe I should just say “hand-shaped,” but I’ve got in in my head that “hand-tossed” is the more commonly used term.) This could include tossing the pizza in the air, stretching it out on a counter by hand, or rolling it out with a rolling pin. Within these two broad categories, pizza has vast variety.
If you like a thicker, heartier pizza, bursting with flavor and loaded with gooey cheese, then a pan pizza is probably the way to go. On the other hand, if you’re looking for something lighter, more delicate, and subtle, then a hand-tossed pizza will be your best bet. Below I quickly detail a few popular styles.* Within these styles are loads of variations and this is only a short list and incomplete list. Another good resource for learning about pizza varieties is Taste Atlas, while it doesn’t get into all the details and can be a little loose in its definitions, it’s an excellent place to start from.
*Keep in mind that there’s a lot of passion around pizza. Below I only describe what I personally expect from each style. Others will disagree with my definitions. I don’t claim to be an expert on any of the styles listed here.
Pan Pizzas
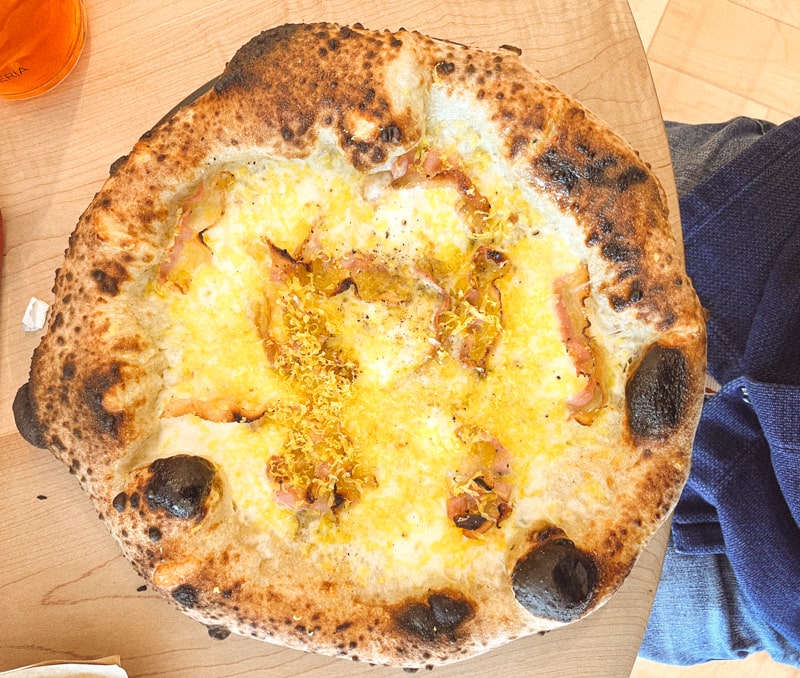
We’ll start off with the pan pizza category. An exciting segment that includes standbys like Chicago deep dish and the more recently discovered Detroit style. Unless noted, the photos are of pizzas I made. Click the links for my recipe reviews.
Chicago-Style Deep Dish
Chicago-style* deep dish pizza’s distinctness starts with its crisp, flaky, pie like crust. The crust itself isn’t particularly thick but it’s dense and substantial, nothing like the thick but light and air-filled crust of Detroit-style pizza. Of all the pizzas listed, Chicago style tends to have the heaviest toppings. It’s typically made in a deep, round dish with the crust wrapping all the way up the sides of the dish and the toppings filling in just below the crust. You can fill the crust with any toppings you want but for me, Italian sausage, sliced provolone and mozzarella, some drained crushed tomatoes, and a little pecorino is the ultimate iteration. Many places order the toppings, cheese, meats, and tomatoes — the reverse of many other pizza styles. I follow this order when making my favorite recipe. Putting the cheese down first, helps protect the crust from the tomato’s moisture, keeping it crisp as it bakes.
*Although most people know Chicago for deep dish pizza and the similarly hearty stuffed pizza offered by places like Giordano’s, it turns out that other styles are actually more popular in Chicago.
Detroit Style
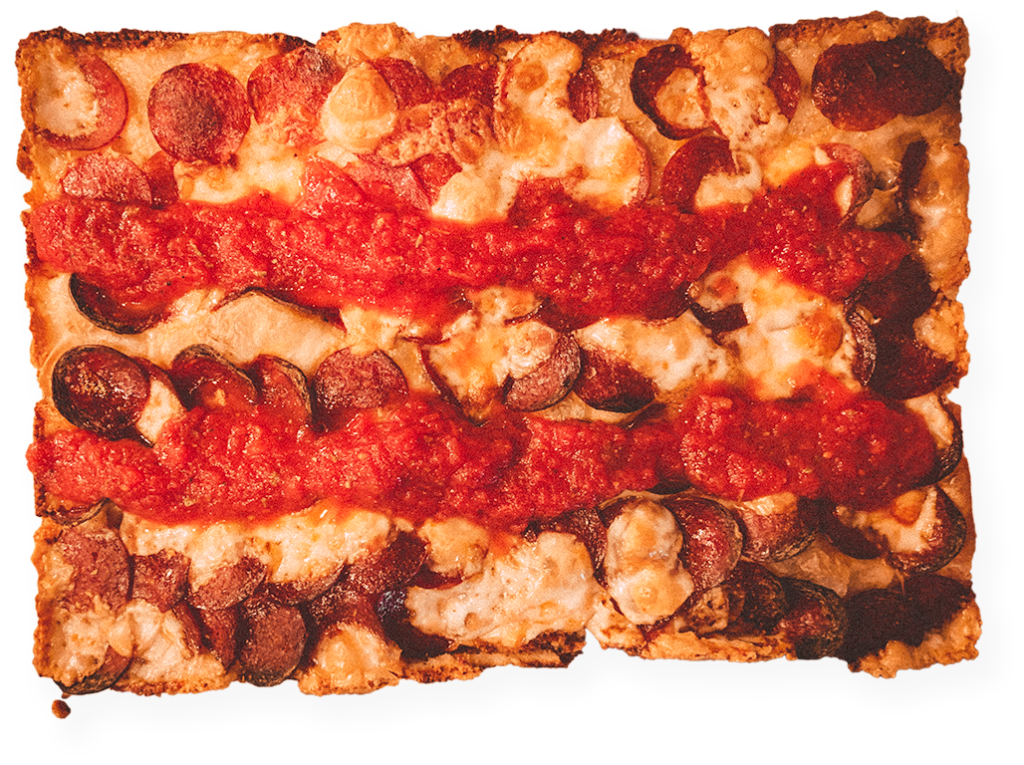
This style has been around for a while but only recently picked up national notoriety. For me, this pizza needs to be baked in a deep dish with a thick-but-light-focaccia-style crust. The toppings should go all the way to the edges so that no crust peeks through. Some people cube the cheese, while others grate it. I don’t think cubing and grating make a huge difference — the important thing is to get the cheese all the way to the edge so that where it meets the pan, it creates a crisp, amazing edge around the entire pizza. Most Detroit-style pizzas put the sauce on last and only in a few stripes, not over the entire pizza. Again, you can top with anything, but I prefer a thick layer of pepperoni, cheese, and then sauce. (I love sauce and sometimes put a layer between the pepperoni and cheese in addition to the stripes on top.) I talk more about Detroit-style pizzas in my ranking of the top ones.
Pan Pizza
Aren’t all the pizzas in this section are pan pizzas? Yes. But, I am giving pan pizza its own category because there are a significant number of pan pizzas that don’t have their own unique names and go simply by “pan.” I’d put Pizza Hut’s Original Pan Pizza in this category. Loads of small pizzerias also offer or specialize in something they call “pan pizza.” In addition to being baked in a pan, most pizzas in this category tend to have a thick crust and hearty toppings.
Roman Al Taglio / Roman Style
This is one of two styles popular in Rome. This style is served for lunch by the slice, only you get to choose where you want the slice cut. Then you pay based on the weight of your slice. In Rome, theses pizzas are backed in huge ovens and can be several feet long. If you’re making this style at home, you’ll probably use a sheet pan. The other popular Roman pizza is discussed below in the hand-tossed section.) I’ve never made it have tried it at Bonci in Chicago.
Grandma-Style Pizza

My experience with this style is fairly limited and there’s a good amount of variation on the definitions I’ve seen. However, people do seem to agree that this pizza should be baked in a pan. Even there the details diverge with some saying you need to use a square pan, while others call for the standard half sheet pan. I also see remarkably strong agreement on this pizza’s origins: Italian-American’s looking to make pizza without a pizza oven. After that, the definitions divide, with some calling for a thick focaccia like crust and others, including Wikipedia, defining the pizza as thin crust. As you can read, my first effort to make it didn’t go well but my second one, linked to in the caption turned out great!
Sicilian-Style Pizza
Sicilian pizza is very similar to grandma style in its origins and differences of opinion on how to define it. Peter Reinhart says that a double bake separates Sicilian and grandma-style pizza, with Sicilian getting a short pre-bake before any toppings are added. The pre-bake stabilizes and sets the crust so that the weight of the ingredients doesn’t weigh it down. My experience at Joe Benny’s, a “Sicilian focacceria,” aligned with Reinhart’s definition and resulted in a thick and crust with a thick layer of crunch surrounding the crusts tender interior. But, of course, Joe doesn’t call his product Sicilian pizza; he calls it “focaccia pizza.” Whatever the name, the one at Joe’s is excellent!
Hand-Tossed Pizzas
Now, I’ll switch gears to discuss hand-tossed pizza varieties. This version has at least as much variation as pan pizzas.
Neapolitan-Style Pizza
Probably the most iconic style out there, Neapolitan-style pizza is also the hardest to make in a home oven. As I detail below, the main challenge with making Neapolitan-style pizza at home stems from the difference between your home oven and the traditional wood-fired ovens pizzaiolos use to make Neapolitan pizzas.
You’ll notice that I keep saying Neapolitan-style pizza when referring to the home oven version. That’s because you can’t make Neapolitan pizza, as defined by the AVPN, in a home oven. Still, you can make something that’s reasonably close and tastes really good. Plus, I like the challenge of trying to do something you shouldn’t be able to.
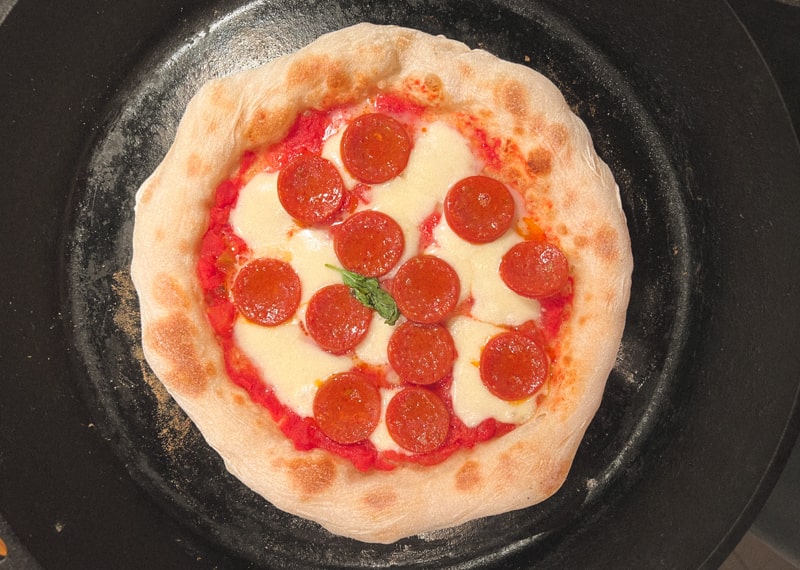
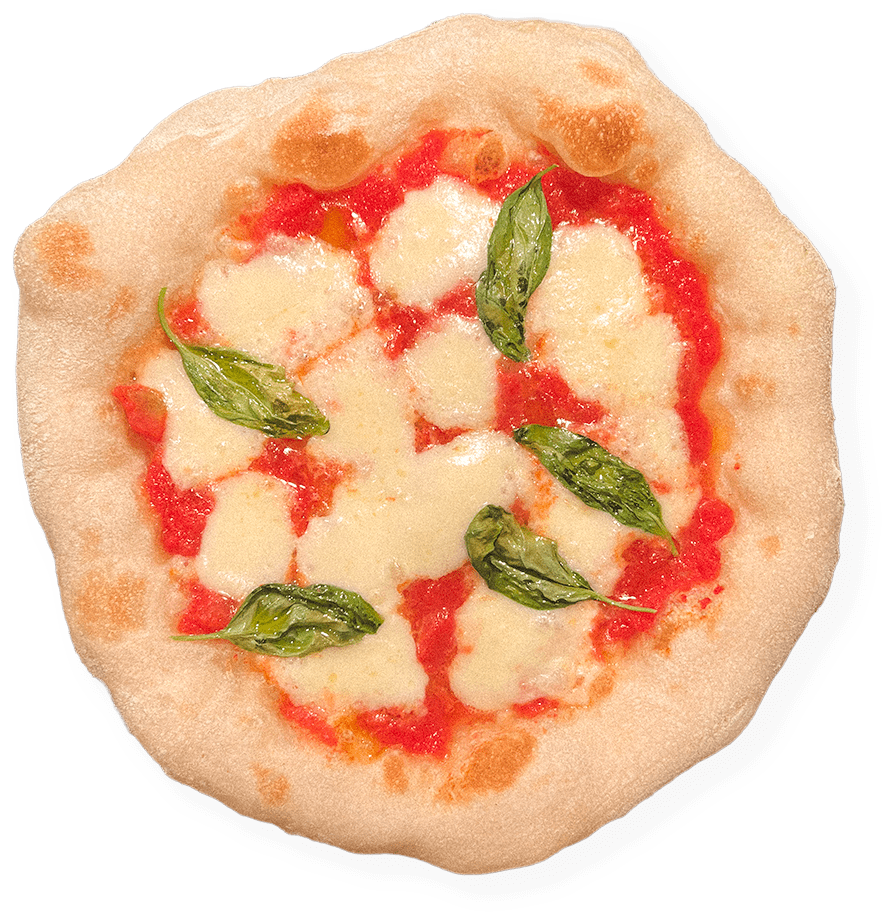
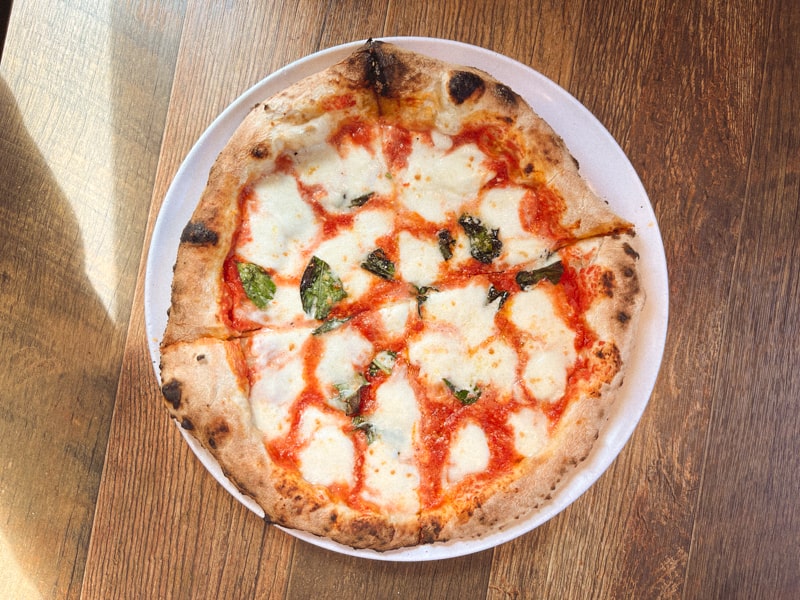
For me, Neapolitan pizza has a softer, more tender crust. While it’s challenging to get in a home oven, some leopard spots will add flavor to this style. And, although I struggle to hold myself back, Neapolitan pizza should be lightly topped.
New York Style Pizza
New York style pizza shares some similarities with Neapolitan pizza: both have a thin crust and are baked at high temperatures. However, New York style is usually made with bread flour and kneaded longer than Neapolitan pizza. This gives New York style more chew. Also, New York style pizzas usually get cooked at a lower temperature than Neapolitan pizzas. And, New York style pizzas tend to be much larger than Neapolitan ones. If you want to make good New York style pizza, I recommend getting something to knead the dough, like a mixer with a dough attachment. The best doughs require a high hydration that makes it impossible to knead by hand and challenging to stir with a spoon — I’ve ended up with multiple blisters after a serious dough mixing session.
St. Louis Style Pizza
I think St. Louis and Chicago deep dish are in a close competition for the most divergent pizza styles. St. Louis pizza uses a yeastless dough that gets its rising power from baking powder. The crust comes out more tender and biscuit like than any other pizza type. In addition to the unique crust, St. Louis pizza also uses a type of processed cheese called Provel. It’s made in St. Louis and hard to get elsewhere, but you can create something similar, as I detail in my posts on St. Louis pizza recipes. Check them out: the first recipe I tried is here and the second one here.
Roman Tonda / Scrocchiarella
This is another style of pizza common in Rome (al taglio, discussed above, is the other). Tonda pizza has a very thin crust and is usually served for dinner in Rome, at least that’s what Ken Forkish says — I’ve yet to visit Rome and can’t verify. As of this writing, I have not made this style of pizza yet, but I am planning to give this recipe a try soon.
New Haven
New Haven “apizza” has some strong similarities to New York style pizza, but it tends to have a crisper crust with a bit more complexity from a longer dough rise. This style also has some unique toppings, like clams, garlic, cheese, and olive oil — no sauce. Frank Pepe Pizzeria Napoletana is widely regarded as the creator of this style. I’ve had this style before but have never made it, and I’m far from an expert on the style. This post covers the style in great detail.
Pan Pizzas Are Easier to Make in a Home Oven
I’ve only scratched the surface of the types and varieties of pizza out there. But, hopefully, I’ve given you enough information to get a sense of pizza’s depth and variety. With that background, I’ll turn to making pizza at home.
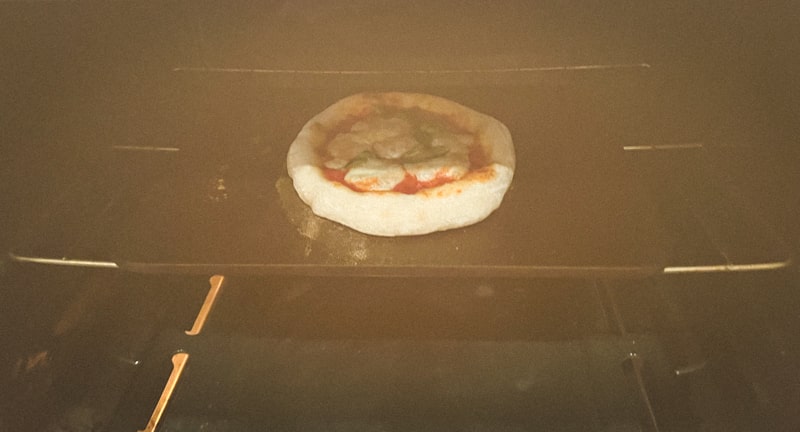
Ovens are a key component in pizza making. Most home ovens max out at 550° F (mine maxes at 500° F). It turns out that 450° to 550° is right where you want to be for many pan pizza styles. And, lots of restaurants that specialize in pan pizzas bake around those temps.
What does this mean for you? It means you already have the biggest, most expensive piece of equipment needed to make pizza in your home: an oven capable of hitting the right temperatures. So, with most styles of pan pizza, there aren’t any equipment barriers to prevent you from baking pizzas of a similar style and quality to those that restaurants produce. And, in many cases, yours will better because you can hand select quality ingredients and take the time and care that many restaurants don’t.
To produce excellent pan pizza, you just need to find and follow good recipes. No need to purchase a special oven before you start. True, in some cases, you might benefit from purchasing a purpose-made pan. I think Detroit is an example of a style you should invest in a good pan, but that’s an investment under $40, and it won’t take up much space. Compare that with purchasing and finding a space for the type of oven you’d need to make true Neapolitan pizza. Ooni and similar companies have made these ovens more obtainable, but even those will still cost over $300, require an outdoor space, and some specialized fuel.
Plus, finding a suitable oven isn’t the only thing that makes pan pizza easier. With pan pizza, you have the pan to guide you as you stretch it out. Hand-tossed pizza requires you to create the shape by hand, without a pan’s guidance. Hand-tossed pizza and pan pizza are analogous to drawing something freehand and staying in the lines of a coloring book.
So, if you’re new to pizza making and want to get started quickly, I’d recommend starting with pan pizza. I list and link to several recipes below. If you’re ready to get going, check out those links. But, if you want to learn more and are interested in other styles, keep reading.
Hand-Tossed Pizza Is Harder but Doable in Your Home Oven

While hand-tossed pizza does take a little more skill and effort than pan pizza, it’s still pretty straightforward if you have the right technique. The first technique tip I’ll offer: don’t try to actually toss the pizza in the air like you see at pizzerias. This adds a level of challenge and difficulty that beginners don’t need to take on. Plus, I believe that tossing the pizza reduces the amount of control you have over the dough. Below I layout my the steps I use to stretch pizza dough and provide a video showing the process. I adopted a lot of my technique from the one Ken Forkish shares in The Elements of Pizza.
Shaping Dough Balls
Getting a nice uniformly circular crust starts with creating a spherical ball of dough before the final rise. Most recipes will call for two rises. Some recipes call for dividing the dough after the second rise, but you’ll have better results if you divide the dough before the final rise because it gives the dough time to recombine after being divided. So, let’s start with shaping the dough after you divide it.
Video Coming Soon!
- Follow the recipe’s instructions for the rise. If the recipe calls for two rises, divide the dough after the first rise. If there’s only one rise, divide the dough before that rise.
- If the recipe suggests oiling the container you’ll store your dough in for either the first or second rise, don’t do it. Use a very light dusting of flour instead. Oil makes it harder for the dough to meld back together after being divided. This can result in gaps and holes when you stretch the dough.
- Divide the dough into the number of pieces the recipe calls for. Try to divide the dough so that you end up with a roughly square piece of dough for each pizza.
- Flatten the dough out gently.
- Grab a corner of the dough and bring it to the center. Turn and repeat on the next corner.
- Keep turning the dough and folding the corners to the center until you have a roughly round shape.
- Put the dough on an unfloured surface. (You want tension between the dough and the counter, which is why you don’t want to flour the surface.)
- Place your hands behind the dough and pull it towards you an inch or so, until you see the surface of the dough tighten a little. Your pinky fingers should be putting pressure on the dough.
- Turn the dough and pull it towards again, repeating the process until you have a nice, tight ball.
- Let the dough balls rise per the recipe instructions, then see the next steps for shaping your dough.
Shaping Round Pizzas
A key to shaping pizza dough is avoiding contact with the outer rim. This keeps the air in the dough and allows for a nice, airy crust to form.
- Put the dough ball on a lightly floured surface.
- Lightly flour your hands and the top of the dough ball.
- Use your fingers to push and gently stretch from the center of the dough out. Don’t touch the area where you want the crust to be. This is when you decide how wide a crust you want — whatever area you leave untouched will be your crust.
- Once the dough is giving you some resistance, pick it up, grabbing just below the crust with your thumb and forefinger on both hands. Again, avoid touching the outer rim as much as possible.
- Let gravity pull the dough down and stretch it as you turn it between your thumb and forefinger. Try to keep a consistent speed as you turn. This will help create a nice, round circle. If the dough is stretching too quickly, let the bottom edge drape onto the counter so that you have control over the stretch.
- Continue doing this until the dough is stretched to your desired thickness. Make sure not to go too thin, especially if you want to put a lot of toppings on. If you get a tear, firmly pinch the dough back together.
Keys to Neapolitan-Style Pizza in Your Home Oven
True Neapolitan pizza as defined by the Associazione Verace Pizza Napoletana (AVPN) requires that the pizza be cooked in a 905° F oven for a maximum of 90 seconds. You can’t do that in a home oven. But, while you can’t make Neapolitan pizza that complies with the AVPN, you can make an excellent Neapolitan-style pizza at home. Just prepare yourself because it will require more effort than most pan pizzas. For me, the challenge of overcoming the home oven draws me to keep making and seeking to improve Neapolitan-style pizzas at home. Here are a few of the key tips I’ve picked up. I also have more details on top Neapolitan pizza page.
- Use the skillet broiler method, with the additions I detail here.
- Get and use 00 flour. It’s available on Amazon and at a surprising number of grocery stores. 00 flour has a fine grind that helps create the tender crust Neapolitan pizzas are known for.
- Buy good canned tomatoes. This is true for most pizzas but especially for Neapolitan. I was amazed at how different good canned tomatoes are compared others. I really like Bianco DiNapoli Crushed Tomatoes, but there are lots of great options.
- Don’t overtop. I still often fail to follow my own advice on this, but, while more can be better on Detroit style pizza, it rarely is on Neapolitan.
Essential Equipment for Homemade Pizza & Using What You Have
If your hobbies come and go like mine, you might hesitate to invest much in pizza making gear. That was my feeling when I started, so I used to learn what I had. Here I share a few things I picked up and a few essential items worth purchasing.
- Scale. In my mind a scale is probably the most important piece of equipment that some home chefs don’t have. A scale will make it much easier to get the dough right — especially when you are starting and don’t know how it should look. If you don’t have one, get one.
- Large bowl. A big bowl makes it easy to mix dough without making a mess.
- Large cast iron skillet. I initially started using a skillet I already had because I didn’t want to invest in a baking steel. Now I’ve tried both and found that I prefer the cast-iron skillet. I use mine regularly for the skillet-broiler method I harp on throughout this site, but you can also use it to make regular pan pizzas in.
- Good pans. This applies especially if you get into making Detroit or deep-dish pizzas. The non-stick properties, high edges, and excellent browning make a pan like this one worth it.
- An aluminum cookie sheet. You can use it to make pan pizzas, including grandma and Sicilian style. Flip it over and use the back as a make-shift pizza peel, but, better still, use the skillet and don’t worry about messing your pizza up when you slide it off.
- A chef’s knife. I find a chef’s knife works well for slicing pizza. No need to purchase a specialized slicing tool.
- Your hands. User your hands instead of a stand mixer. Some recipes call for a stand mixer to do the kneading. As of this writing, I don’t have one. Instead, I knead things by hand.**** You’ll want to double the kneading time if you do it by hand instead of a mixer.
- A large, metal spoon. Use a spoon in place of a stand mixer for wet doughs. If you’re making a particularly wet dough (high hydration), you may struggle to knead it without adding loads of flour. In that case, you can use a spoon and mix it by hand. If you go this route, I recommend holding back some of the flour until the very end. This will make your dough easier to mix.
*Kneading by hand has some pros and cons. The most relevant pro here is that it allows you to make pizza even if you lack a stand mixer. Hand mixing also gives you more control over the dough, making it harder to overwork the dough. That said, kneading by hand is more work. Mixing by hand also usually requires adding flour, so you’ll reduce the dough’s hydration a bit. In some recipes, this will be a bad thing. In others it won’t make much difference.
If you are just trying out making pizza at home, work with what you have to see what kind of pizza you like to make. Starting with what you have will show you what works and what you really need. Once you identify the style(s) you want to focus on, you can decide which specialized equipment to invest in.
Pizza Stones and Steels
Pizza stones and steels can help enhance the crust of hand-tossed pizzas, but you don’t need them for pan pizzas. I’ve used both and, if I had to choose one, I’d choose the steel. A steel will last you a lifetime — I broke my stone pretty quickly when I put a pot on it. In addition to its durability, a steel will also produce better pizza. That said there’s a reason I didn’t include the pizza steel in my list of essentials. If you came to me for advice on what to get, I would suggest purchasing a large cast-iron skillet instead. Cast-iron skillets are nearly as durable as steels, and, with the right technique produce the better pizza. Plus, they cost way less. If you want to learn more, check out my Baking Steel review.
Flours & Yeasts for Homemade Pizza
If you don’t make bread, then you might find the variety of flours and yeasts available confusing. Don’t worry — with two simple rules, you can avoid any issues. Here are the rules, followed by a bit more detail.
- Avoid substituting flours.
- You can use instant dry yeast and active dry yeast interchangeably.
Other sites get into lots of detail on the different varieties of flours, and if you’re interested in learning more details, here’s a good site. Here, I’ll just explain the basics and why you should avoid departing from the flour a recipe suggests.
One of the biggest things that impacts a dough is its hydration level — i.e. how wet or dry it is. Different flours have different percentages of protein. Flours with more protein absorb more water, while those with less protein take in less water. So, if you substitute the flour in a recipe, you’ll end up altering one of the most important aspects of the dough — its hydration level. That is why I recommend avoiding flour substitutions. Of course, if you’re experienced and have made the dough before, you’ll have an idea how it should look and feel. In this case, you can substitute flours, keeping in mind that if you use one with less protein, you’ll likely need to use a bit more and vice versa. Either way, keep in mind that the hydration is just one impact of substituting flours. Flour also significantly impacts a dough’s texture, with higher protein flours tending to add chew and lower protein ones adding more crispness and crunch.
There are lots of types of yeast out there but the two you’re most likely to see are active dry yeast and instant dry yeast. I’ve seen differing views on substituting instant dry and active dry yeast, with some calling for 25% more active dry yeast if you sub it for instant dry yeast and 25% less instant dry if you substitute it for active dry. Many people also say you can substitute them one for one and that is what I do. Although you may see sites claiming otherwise, you don’t need to put active dry yeast in water to dissolve and activate before using — check out this King Arthur test if you think I’m crazy. However, as the King Arthur link notes, you can put active dry yeast in warm water to make sure it’s still alive and active. If you have concerns about the yeast, this is a good idea because if it turns out the yeast is not active, you can just discard the yeast water and start over. On the other hand, if you don’t check the yeast, you won’t discover the issue until the dough fails to rise. At that point, you’ll have to throw out the entire dough batch and will have wasted time waiting for it to rise.
Volume to Weight and Weight to Volume
While I strongly recommend purchasing a scale and weighing your ingredients, not having a scale shouldn’t keep you from pizza making. Also, you may sometimes find a recipe that only has volumes. King Arthur has an extensive conversion chart for converting weights to volume and vice versa. If you don’t see something on the chart, just Google “_______ [ingredient name] cups to grams” (or whatever measurements apply).
Topping Tips
Here are some general tips for topping pizzas.
- Usually, you aren’t going to have many toppings on your pizza so get high-quality ingredients. I think that’s especially true for the tomatoes that go into your sauce. They make up such a large portion of the pizza and are a key flavor component. Regardless of the pizza I’m making, I prefer Bianco DiNapoli Crushed Tomatoes. I typically use them right out of the can. If you want a smoother sauce, put them in the blender.
- The amount of toppings a pizza can handle relates to the thickness of the crust. If you’re making a Neapolitan-style pizza with a delicate, thin crust, use restraint when topping. On the other hand, Detroit-style pizza can handle heavy toppings.
- The pizza crust is a blank slate. Things that taste good with one another on their own will probably tasted good on pizza. Just keep in mind what you’ll need to cook and what you won’t — i.e. pepperoni is better cooked, but arugula is not, so you’ll add pepperoni before baking but arugula after.
- Avoid toppings with lots of moisture. If you want to use them, cook or drain them in advance to extract as much moisture as possible. This has more of an impact the longer the cooking time. So, if your toppings are only going to be baked on the pizza for 5–10 minutes, they won’t have much time to release their moisture.
- Don’t overcook fresh mozzarella. You should only use fresh mozz for quick cooking pizzas, like Neapolitan-style. Even for those styles, you may want to put the cheese on after the rest of the toppings have had a chance to cook a little. Experiment to find what works. The goal with fresh mozz should be cheese that’s just starting to melt, nice and creamy, not bubbling or emitting liquid.
- Toppings are where you can express your creativity and try new things. Don’t be afraid to experiment!
Vegan Options
I talk a lot about my love for pepperoni on this site, but pepperoni not a traditional pizza topping. In fact, some of the earliest pizzas were vegan. For example, I’ve read multiple accounts that date pizza marinara — traditionally made with just tomatoes, garlic, and oregano — to the 1700s. The story goes that fisherman used to fold the pizzas in half, tuck them away, and take them out to eat on the boat, which is where the name pizza marinara came from, marinaio being the Italian word for mariner. So, if you really want to be authentic and traditional, a vegan pizza is the way to go. I also have additional thoughts, but I’m not a vegan, so take what I’m about to say with a grain of salt.
Although you might not guess it from reading some posts on this site, I eat vegan dishes with some regularity. The ones I like best don’t involve things that are supposed to taste like meat or cheese but are actually some processed amalgamation of ingredients. Instead, the best vegan dishes I’ve had embrace the lack of meat and animal byproducts and focus on the beauty and flavor of simple, unprocessed ingredients that happen to be vegan. So, if I had to recommend a vegan pizza, I’d first suggest making a pizza marinara with quality canned tomatoes, oregano, and garlic. Or, you could do a thicker crust pan pizza and top it with heirloom tomatoes, garlic, basil, and olive oil. For something more unique, I’d go with caramelized onions, walnuts, thyme, and balsamic vinegar — something like this Reinhart recipe, minus the meat and cheese. I think there are loads of topping combos out there. Use your imagination and don’t feel that you need to add a cheese substitute in order for it to be “pizza.”
Tips & Keys to Get the Best Pizza From Your Home Oven
Most recipes will have solid instructions explaining how to mix, top, and cook your pizza. However, some won’t and sometimes you’ll your set up will lead to something the recipe didn’t anticipate. This section provides some generally applicable tips to make sure your homemade pizza comes out great. Bottom line: recipe writers can’t account for and anticipate every variation out there, so you’ll need to user your senses and judgment to adjust when something doesn’t seem right.
Use your senses
If something looks underdone even though you’ve left it in the oven for the recipe-specified time, leave it in a little longer. Ovens vary widely and do not always keep the temperature you set them for. Similarly, if it looks like your pizza is burning, take it out, even if the recipe says it will take longer. Does the recipe say the dough should be wet but it’s totally dry? Add a little more water. The ambient humidity and even the brand of flour can impact a dough’s hydration.
Know Your Oven
Do your pizzas consistently take longer to cook? Maybe your oven runs a little cool and you should add a few degrees to what the recipe suggests. If your pizzas cook too fast, back down the temps. You can also get an oven thermometer to check the actual temperature.
Does your oven have a top and bottom element or only one or the other? Do you have control over which elements are on? Knowing these things can help you understand what to expect and how to respond — if you have a bottom element only, then you might need to move the pizza to the broiler towards the end if the bottom starts to burn. If you can control the elements, you can turn them on and off based on how the pizza cooks. Also, try adjusting your oven racks to find where pizzas cook best. This may vary by type of pizza — thicker crust pizzas may do better closer to the bottom heating element, where the thick crust has time to cook before the toppings burn.
Rise Time Has an Impact
Pizza and bread expert Ken Forkish mentions time as one of the key elements to dough, putting it on par its physical ingredients — flour, water, yeast, salt, and, sometimes, oil. A longer rise time typically gives the dough more time to develop flavor. Longer proved doughs also tend to have more chew and be easier to handle when stretching.
Given the benefits, why wouldn’t you go for a longer rise? Well, first, if you let the dough rise too long, it can overproof (see next section for more). Second, sometimes you want a simpler flavor and more crunch instead of chew. And, finally, you won’t always have time for a longer rise.
Common Mistakes to Avoid When Making Pizza at Home
We covered tips to improve your homemade pizza outcomes, but what should you avoid doing? Here’s a list of a few common mistakes, I made while learning to make pizza.
Not Preheating the Oven
You should preheat your oven for at least 30 minutes and up to an hour before you plan to put your pizza in. You want everything in that oven to heat up, which will reduce the temperature fluctuations when you add your pizza to the oven. This is especially true if you’re using a pizza steel or stone.
Letting the dough overproof*
Temperature, humidity, and other factors can significantly impact rise times. For example, if you put the dough in a warm place, it will rise faster than it would in a cool place. Most recipes have an estimated rise time and also mention an expected change in volume. Pay attention to both. Say the suggested rise time is 4 hours and the recipe says the dough should roughly double by that point. If it’s only been 3 hours but the dough has more than doubled in size, consider ending the rise early. To end the rise, you can simply start making the pizza. If it’s too soon for you to make the pizza, then you can put the dough in the refrigerator. This will slow the rise way down. Just make sure to take the dough out at least an hour before you plan to bake it so that it can come to room temperature before you start baking.
*How do you know if your dough has overproofed? The most obvious indication is if your dough has started deflating or decreasing in size. Look out for “high-dough marks” — marks left by your dough at a place higher than it currently is. If your dough has overproofed, don’t despair, you can save it.
Substituting Flour Types
Because flours absorb different amounts of water, you shouldn’t use them interchangeably. For example, all-purpose flour absorbs less water than bread flour. So, if a recipe calls for bread flour but you substitute all-purpose, the dough will end up much wetter than intended. See the section above on flours and yeasts for more.
Not Watching the Pizza Closely
Many pizzas are cooked at high temperatures. Because of this, they can go from slightly underdone to burned in minutes. To avoid burning your pizza, make sure you check on it. When I’m trying a new recipe, I like to set a timer for the shortest time the recipe suggests and check the pizza at that point. As suggested above, getting to know your oven — do things usually take more or less time than the recipe suggests — will help you getting your timing down.
Overtopping
I still struggle with this. I always want to load my pizzas with toppings. However, less is often more when it comes to pizza toppings. You need to find a balance.
Recommended Recipes to Start With
I have a list of quick and easy recipes that can provide you with several good options if you’re new to pizza making. But, the truth is most pizzas aren’t that hard to make, although some do take more time. To supplement the linked to page, here are my favorite recipes from a few popular styles.
Neapolitan. I love Brian Lagerstrom’s Neapolitan-style pizza. I’ve tried a lot of recipes in this style and, while many are good, I still think this one is the best. The recipe is for an Ooni oven, but I use the skillet-broiler method and get great results.
Detroit. My favorite Detroit-style pizza is Peter Reinhart’s version, but you really should buy the book for that one. (I did find this version that looks very similar to what’s in the book and indicates it was adopted from the book with permission, so you could start there if you don’t want to invest in the book yet.) My second favorite Detroit recipe comes from J. Kenji López-Alt. I have more detail and recipe suggestions on this page about the best Detroit-style pizza recipes.
Chicago. The best Chicago-style pizza recipe I know, I learned from my dad. I provide the full details on this post.
Reheating Pizzas
In my opinion, some pizzas taste better when reheated the second day. I have a few theories on why this is. First, refrigerators are dry places. Letting the pizza sit in the fridge overnight gives any excess moisture from the toppings to evaporate. This allows for an even crisper crust on the second day. Second, some thicker crust pizzas take a long time to cook. Sometimes, you have to take them out just a little early to prevent burning. As they sit and cool, the cooking continues and all they need is a little reheating to recrisp the crust. Finally, some topping heavy pizzas seem to benefit from a chance for the flavors of the toppings to meld.
So, how do you reheat pizza? Generally, I try to reheat pizza the same way I originally cooked it. Just be sure to monitor it closely as it will often finish faster on the second day. Another method is to heat a cast iron skillet, pop the pizza in, and cover it with a lid. If you go this route, make sure to watch the bottom closely.
Final Thoughts
Even though I’ve covered a lot here, I feel there’s way more to say. If you have a question or see a way to improve, please let me know! Pizza is one of the best foods in the world. What are you waiting for? Make one today.