In this review of the Baking Steel Griddle, I’ll explain why I don’t think it’s the best option for Neapolitan-style pizza and why it’s probably not worth the extra money to purchase a branded baking steel.
Since I got into pizza, I’ve been searching for a way to make better Neapolitan-style pizza in my home oven. While I have had good success with the skillet-broiler method, I had also seen glowing reviews for baking steels. Hoping for a way to improve my pizza, I decided to purchase a steel.
Why not get an Ooni? I live in a one-bedroom apartment, so, unfortunately, I have no where to store or use an Ooni. For those with space, an Ooni or similar oven would be the way to go for Neapolitan-style pizza at home. But if you’re stuck in a small high rise apartment like me, you’ve got to focus on maximizing your kitchen’s oven. Update: I moved and Ooni came out with the all-electric Volt 12 oven. I got one, which I review here.
The Baking Steel vs. Other Cooking Steels
Once I decided to buy a baking steel, I spent a while researching available options. In the end, I narrowed my search to two sources: the “original” Baking Steel and a company with significantly cheaper options and faster shipping on Etsy. I selected these two companies because both offered 3/8”+ thick steels that could double as stovetop griddles. Thicker steels provide more mass, which from my limited understanding means they can store more thermal energy that can be quickly transferred to a pizza our whatever you’re cooking. Getting a griddle thrown in with the pizza steel seemed like a bonus I shouldn’t miss out on. The Baking Steels max out at 3/8” thick. 222Steel, the Etsy seller, offers steels up to 1/2” thick and at even larger dimensions than Baking Steel. So, while Baking Steel’s largest griddle-steel combo comes in at an impressive 25 pounds, 222Steel offers steels twice as heavy* for less money. Both companies’ steels come pre-seasoned.
*Baking steels are heavy! If you have concerns about moving a heavy, awkwardly shaped object, then a steel is probably not the right choice for you.
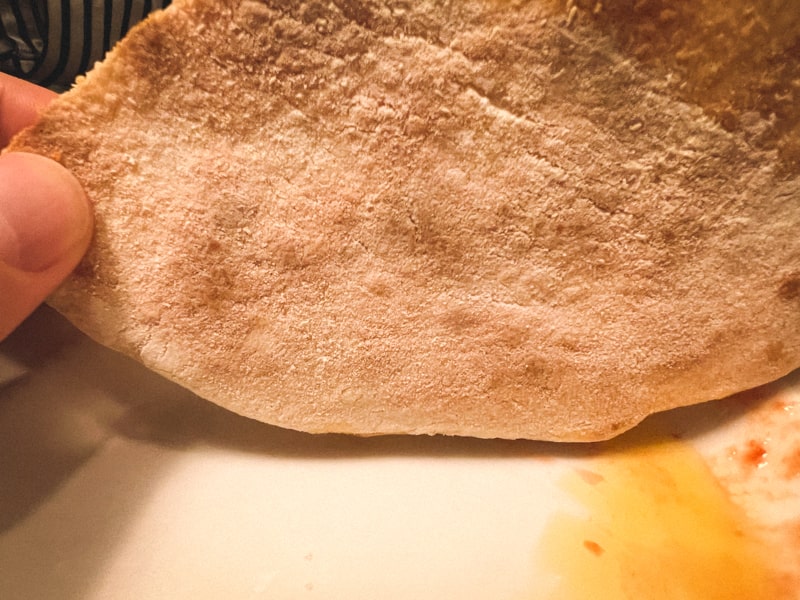
Ultimately, I decided to go with the Baking Steel Griddle. While it cost significantly more and took about a month to arrive, I figured it would be worth it because I’d end up with a well-crafted product. I was wrong. As this post’s title indicates, the Baking Steel Griddle is simply a piece of steel. The edges are rough, to the point that I feel it necessary to handle carefully. One side is not straight. The grease moat around the edge seems a little off-centerd. Bottom line: I did not receive the artisanal, lovingly crafted product I’d hoped for. I got a heavy, rough-hewn cooking implement. Given that, I can’t see any reason to pay and wait for an official Baking Steel. I recommend that you go with the product that has the mass and dimensions you want, a good price, and can be delivered to you quickly.
I will say that the customer service representative at Baking Steel was very responsive and nice. They offered to send me a replacement with the caveat that it too might also have a similar issue. So, my steel wasn’t an anomaly and if you do purchase from Baking Steel, manage your expectations — it’s going to be a rough piece of steel. You’re paying for the brand name and good customer service. The product itself is, wait for it, just a chunk of steel.
Baking Steel vs. Skillet Broiler Method for Neapolitan-Style Pizza
Let’s get to my evaluation and comparison of the baking steel. Prior to purchasing the baking steel, my best Neapolitan-style pizza came via the skillet-broiler method. So, the steel needed to beat pizza made with that method to be worth the investment.
First, a few notes. Here I’m comparing the Baking Steel Griddle to a 15-inch Lodge cast-iron skillet. In this situation, mass matters, so if you have a smaller version of either of these, your results may vary. I’m also cooking in a low-end oven, that lacks a top heating element and allows for a max temperature of only 500° F (many ovens get up to 550° F).
See the update below discussing a better method made possible by my new electric oven.
For this comparison, I did two tests. For the first, I used Ken Forkish’s 24–48 Hour Pizza dough. It’s an excellent dough, modified to perform well in the home kitchen. I followed the recipe closely, without modifications. It’s a long-fermented dough that you refrigerate overnight. The long-refrigerated rise, high hydration, and other things make it far from a traditional Neapolitan dough, but, using a traditional Neapolitan dough, won’t work well in a home oven.
For the second test, I used Enzo’s Pizza Dough. This dough is based on a dough from a Naples pizzeria called La Notizia. It ferments for 10 hours at room temperature. While the hydration is higher to help it perform better in the home oven, this dough is closer to traditional Neapolitan dough than the 24–48 Hour Pizza dough. Both recipes come from Forkish’s book, The Elements of Pizza.
Quick Comparison
| price* | weight | peel req’d | crust | |
| Baking Steel | $219 | 25lbs | Yes | crisp |
| Skillet | $55 | 12.36lbs | No | soft |
Pizza Cooked on the Baking Steel
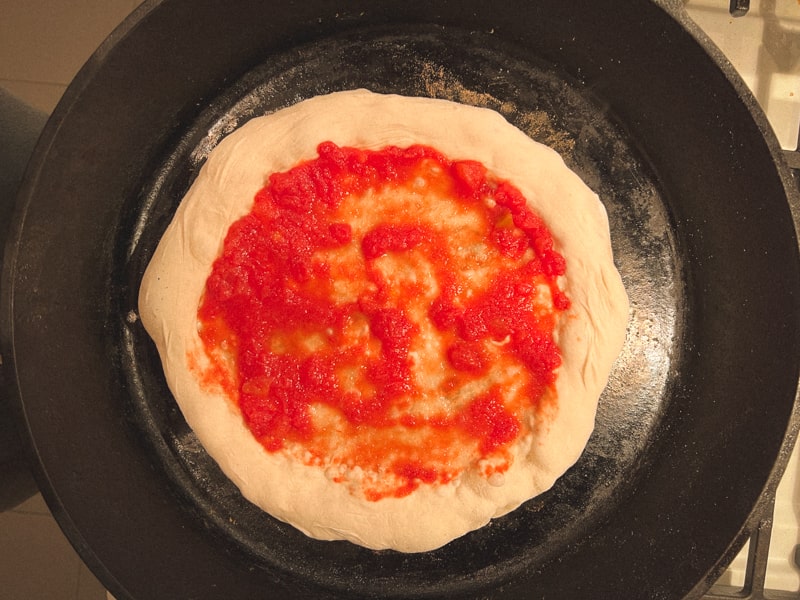
For the first comparison, I heated the baking steel at 500° F for over an hour. A long preheat is critical because the steel takes a while to fully heat up. I put the steel on the middle rack of my oven.
I was a little nervous about getting the pizza from the peel to the steel, so I practiced several times with an untopped pizza, as Ken Forkish recommends. With some practice, I got the technique down. You want to wiggle the pizza back and forth a little to make sure it slides easily, before trying slide it completely off the peel. When you transfer to the steel, focus on pulling the peel out from under the pizza, like a table cloth from under dishes. Even with some practice, it can be challenging not to disturb the ingredients. Don’t worry if you mess up a few — even at pizzerias, you’ll get an occasional pizza where the ingredients clearly shifted during the peel-to-oven transfer. I definitely had some ingredient shift on my first attempt.
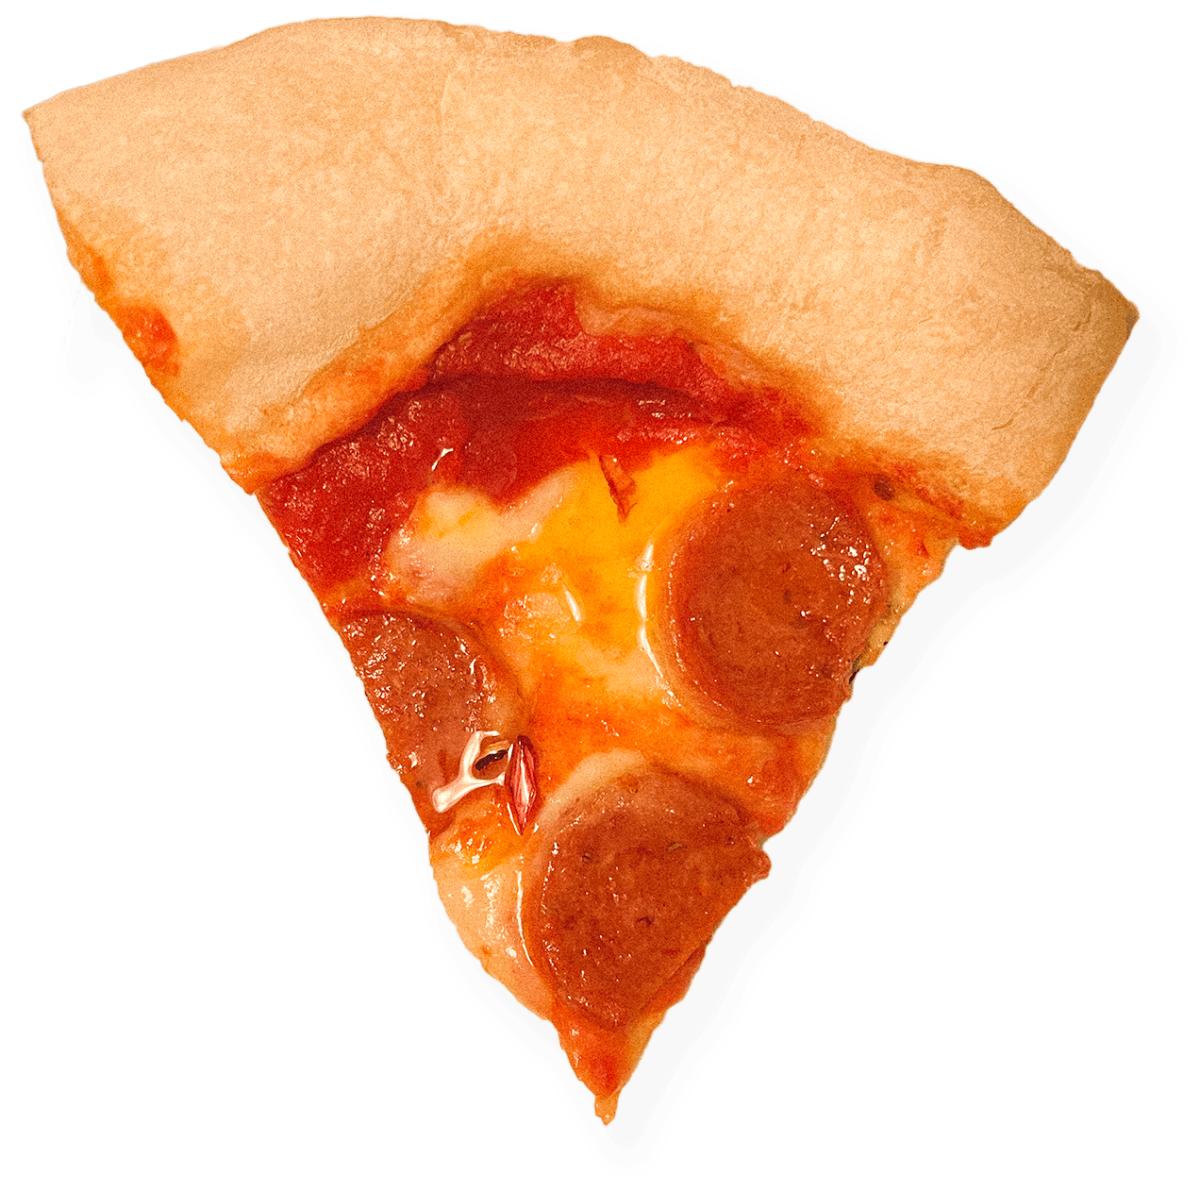
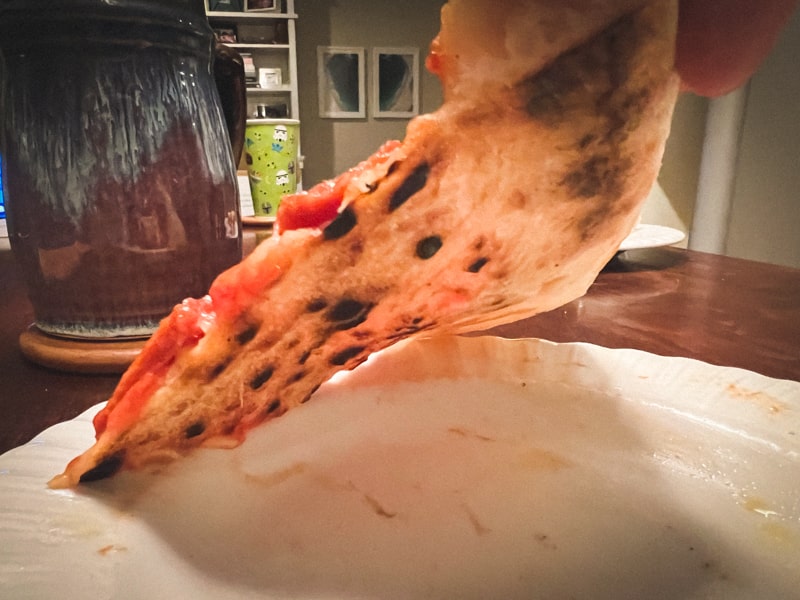
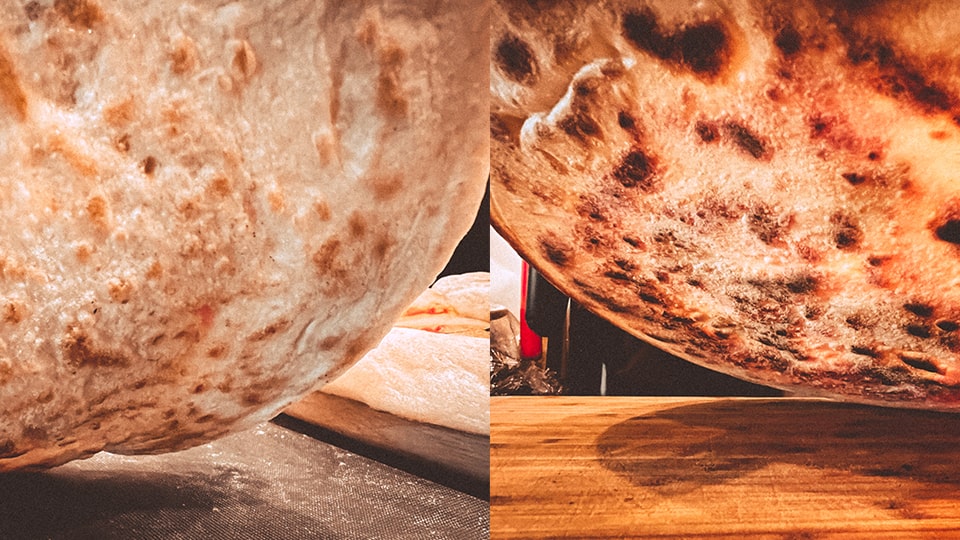
I cooked this first pizza for about 8 minutes at 500° F. When I took it out, the neither the top nor the bottom of the crust had any charred areas (“leopard spots”). I expected that on the top since my oven doesn’t have a top-heating element. But, I’d hoped for more spotting on the bottom. All I got were a few lightly browned areas.
How about the taste? Despite the lack of char (image above), the crust came out with a crisp bottom layer, much crisper then Neapolitan pizza should be. It tasted good, but lacked the light and delicate crust Neapolitan pizza should have. Overall, a good but underwhelming result, below my expectations.

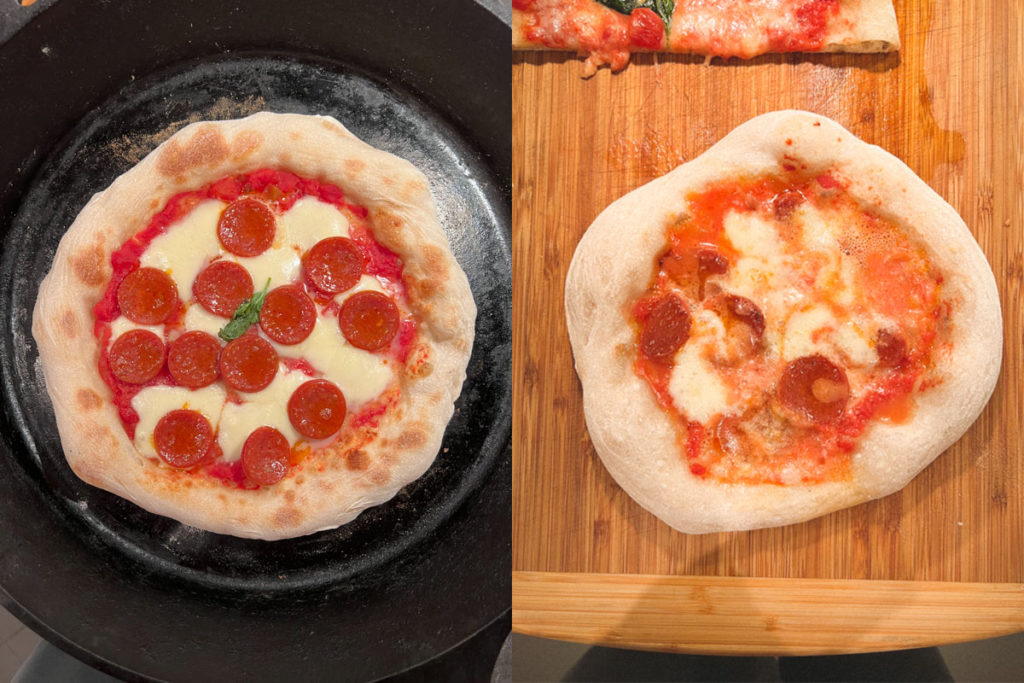
I made a few changes for the second test but the results were similar. In addition to using Enzo’s dough, I also moved the steel to the very bottom of my oven, just above its sole heating element. I hoped this would help the steel get hotter and possible add some char. I left one of the Enzo’s pizzas in for a while which did provide better browning on the bottom. However, the pizza still ended up with an overly crisp crust, and, as you can see from the photos, leaving it in longer led to way overcooked mozzarella. Even though I didn’t leave the second pizza in as long, the results remained similar.
So, while pizza cooked on the baking steel is good, it seems you can’t get very close to Neapolitan-style pizza with a baking steel.
Pizza Cooked with the Cast-Iron Skillet Using the Burner & Broiler

For the skillet-broiler half of test one, I did two of three pizzas with the skillet-broiler method because I was nervous about sliding the third, larger pizza on to the steel. The first pizza had some brown, not quite charred spots. Looking for more char, I let the second go a little longer on the burner and ended up with some nice leoparding on the bottom. However, while the second one looked more like Neapolitan pizza, the first had a better texture — softer and more delicate.
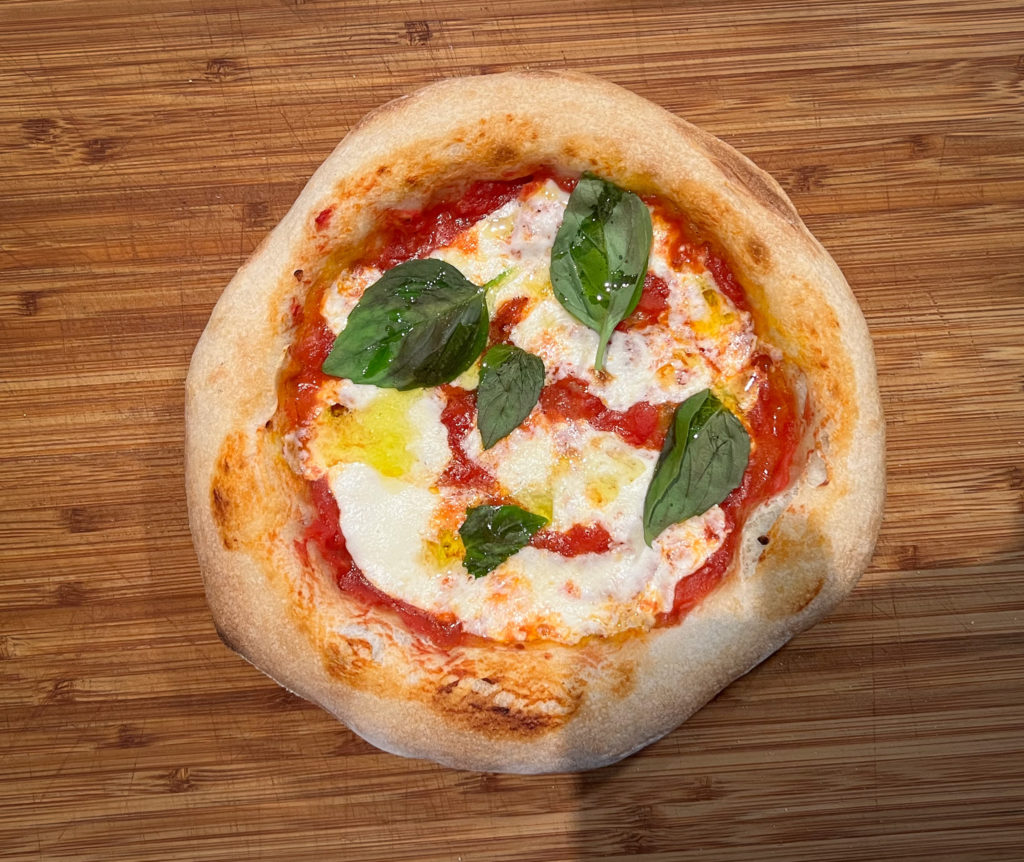
For the second test, using Enzo’s dough, the first pizza I cooked via the skillet-burner method came out excellent…very close to what I think Neapolitan pizza should be. It had some nice charred areas, was nice and tender and had an excellent crust, full of air and irregular bubbles. Plus, the toppings were cooked just enough.
In both tests, the skillet-broiler method produced significantly better results than the pizza steel.
Why did the Skillet Deliver Better Pizza than the Baking Steel?
I’d read great reviews on the baking steel and had high hopes that it would be the key to great Neapolitan-style pizza in my home oven. It turns out, I already had a better method via my 15-inch cast-iron skillet coupled with the stovetop and broiler. Although I read reviews of baking steels, I didn’t think through or research the science carefully when prior to purchasing the baking steel. Nope. I did that after my results didn’t turn out as expected. With some more information, it’s not hard to see why the skillet out performs the steel for Neapolitan-style pizzas.
Temperature is the key difference between the Neapolitan ovens and the one in your kitchen. While the baking steel does an excellent job conducting heat to the pizza crust, it’s still limited to your oven’s maximum temperature — 500 to 550° F. And, because the steel constantly radiates heat out, it only gets to about 450° F even in a 550° F oven, 450° below the 900° F plus temperatures true Neapolitan ovens hit. And, more importantly it turns out,* once the steel gives up its retained heat to the pizza you put on it, it takes a long time to regain that heat — longer than your pizza will be in the oven. That’s why the skillet beats the steel, the real benefit of cooking pizza in a stove-top skillet is that the skillet gets more heat faster from the burner than the steel does from the oven, allowing the skillet to rapidly and continually replenish the heat it loses as it cooks your pizza. What’s more, by putting down the crust first without toppings, you reduce the mass that can dissipate the heat from the skillet, allowing more heat to flow to the crust. (This last bit is my own unscientific logic.)
*Initially, I thought that the skillet did better because it could get hotter than the oven-limited steel. However, because steel conducts heat better than the material on the bottom of Neapolitan pizza ovens, you actually don't want your skillet much over 500° F. Plus, if you heat the skillet too hot, you can risk damaging it, including cracking it. And, you need to make sure to keep it at a temperature you can safely handle with your oven mitts when you move it to the oven. So, the key is the constant heat from the burner, not getting the skillet up to a crazy high initial temperature.
Even the cook times make sense: the pizza only cooks for a few minutes on the burner, not far from the 90 seconds a Neapolitan oven takes, while the pizza cooked on the steel takes much longer. With the skillet, you can get the time spent cooking the bottom of your pizza reasonably close to the time the entire pizza spends in an actual Neapolitan oven. The top does spend longer under the broiler, but the toppings seem to protect it and make the longer top cook time less detrimental to the pizza than a prolonged heating of the bottom would be.
Cast-Iron Skillet Beats Baking Steel
My large cast-iron skillet beat my $219 Baking Steel Griddle in just about every category. The skillet is significantly cheaper, easier to use, doesn’t require the purchase of a peel, and, most importantly, produces a better pizza, with a softer, more delicate crust, and better rise in the outer rim. When it comes to pizza making, the one area where I prefer the steel is that once you put it in the oven, you don’t need to do anything until it’s ready to pull out…unless you have a top heating element and notice it’s cooking faster on one side than the other, if that happens, you’ll need to rotate it.
One more advantage of the cast-iron skillet. With both the skillet and the steel, the crust needs longer to cook than the mozzarella. The skillet lets you easily remove the pizza to add the cheese and put it in for just a few minutes to get the cheese right where it needs to be. With the steel transferring in and out of the oven is harder. You would have to either remove it with the peel, hoping it’s cooked enough to allow that, and then top and slide it back in, or try and top it while the pizza is in the oven, doing your best to avoid the hot oven sides and top, while letting all your oven’s heat escape. Overall, the skillet has way more control. Does the bottom need a little more time? Move the skillet back to the burner after the toppings finish in the broiler. More on browning needed for the top? Back to the broiler. Toppings cook faster than the crust? Add them later.
Do I regret my baking steel purchase? No. While I think I overpaid and am unlikely to use the steel regularly for pizza making, it is amazing on the stovetop. You can get an impressive sear on steaks, cook large quantities of breakfast items, and so much more. (Based on my stovetop success, I’m considering trying a new pizza method where I start by cooking the pizza on the steel placed on the stovetop, then transfer the pizza to a the broiler to finish the toppings.)** Plus, most of my disappointment came because I wasn’t able to produce good Neapolitan-style pizza with the steel. For types of pizza where a crisp crust is desirable, I can see the steel working out better. Finally, while I haven’t tested it, the steel apparently helps regulate oven temperature, improving results in some, but not all, baking and roasting applications. So, while I probably wouldn’t purchase a Baking Steel again, a steel for baking and use as a griddle is a worthwhile investment.
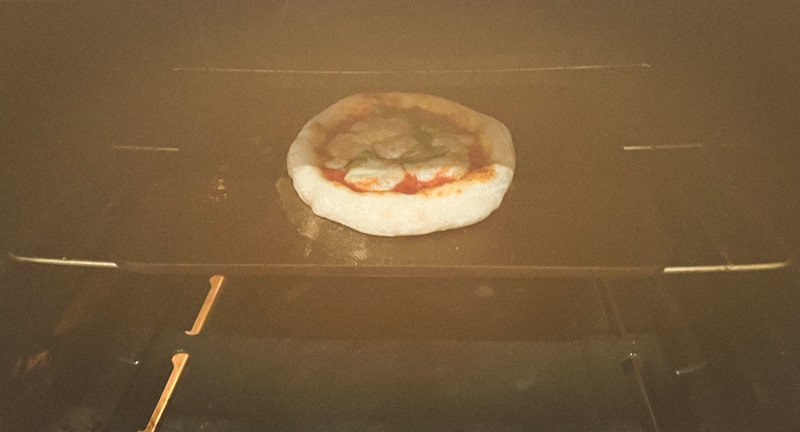
**Update: I tried this using Enzo’s dough. I heated up the steel on my stove top, put the pizza crust down, and added sauce. After a few minutes, I moved it to my cast iron skillet. This allowed me to transfer it to the broiler to finish the top. The results were disappointing (image below). While the steel cooked version cooked the bottom more evenly, it took longer to cook and, even with the extra time, did not get the dark spots the cast iron version did. I heated the steel for a while, but maybe I didn't heat it quite long enough. I'll try it at least once more.
Electric Oven Update
All the above is based on my experience cooking in a gas oven that lacks an upper heating element. I recently moved to a new place with an electric oven that has heating elements in both the top and the bottom. The new oven has a broiler option that lets you turn on only the upper element. This allows for another technique with the baking steel, which produces better results than were possible in the gas oven.
What’s the new technique?
- Place your baking steel as close to the top of the oven as possible, while still leaving space to slide a pizza in — for me, that’s about 4-5 inches.
- Preheat the oven to the maximum temperature (550° Fahrenheit in my oven).
- Once the oven comes to temperature, let it heat for at least 30 minutes.
- Ten minutes before putting the pizza in, switch from oven mode to broiler mode at the highest setting.
- Right before you put the pizza in, switch back to oven mode at maximum heat. Do not leave the top element on while cooking the pizza — the top will burn way before the bottom cooks.
- Slide your pizza in and let it cook until done.
Turning on the top element just before putting the pizza in does two things. It gives the steel an extra blast of heat right before the pizza goes down. And, the element itself gets really hot so that its residual heat cooks the top of the pizza.
With this technique, my pizzas take about 5–6 minutes, several minutes less than with the technique laid out above. And, while the crust still ends up crisper than it should for Neapolitan style, it’s the best I’ve produced with the baking steel. I doubt it will beat the skillet method (I haven’t put that to the test yet), and it certainly doesn’t beat what I can make in the Ooni Volt 12.