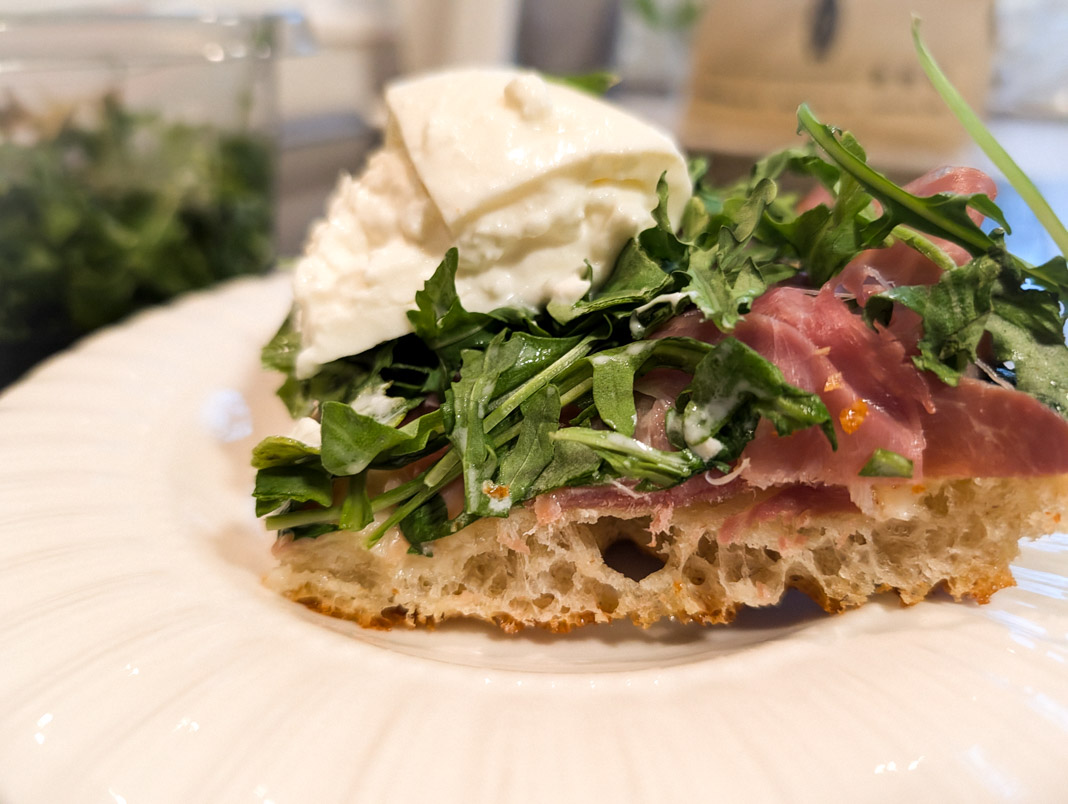
The image is a recent pizza with prosciutto, mozzarella cubes baked into the crust, arugalla, and burrata, drizzled with olive oil and hot honey.
I have been making Detroit-style pizza for years. For a long time, I tried various recipes to get a sense of what I like. I even ranked my top recipes. Recently, I began taking what I’ve learned from all the recipes I have tried to come up with my own, ultimate recipe.
My goal is not to perfectly recreate Buddy’s or Jet’s pizza, but to design my own version. What I think represents the pinnacle of Detroit-like pizza. For me, that means contrasts between crisp, tender, and soft, a light, airy dough that is still heavily topped. Getting this required some changes to what most recipes call for. I added some all-purpose flour. I also started doing a pre-bake without the toppings. I put the sauce on last.
I am overall very pleased with the results, but I also think there’s always room to improve. I recently fed my recipe into Claude and asked for advice. Claude thinks I should: (a) have 20-30 minute autolyse, (b) allow for 15-20 minutes between stretch and folds, and (c) bake at 550° F instead of 500° F. So, if you want to try an AI variation on this take Claude’s advice.
Or, if you don’t trust me, try one of the recipes in my top 5. The great thing about Detroit-style pizza is that it is easy to make. Even the worst recipe I’ve tried has turned out very good.
The Recipe
A long-fermented, sourdough-leavened Detroit-style pizza with a two-stage bake for maximum crust crunch and perfectly finished toppings.Timeline at a GlanceThis is an all-day recipe. Here’s a rough schedule assuming a 8:30 AM start and a kitchen temperature around 70–72°F. Adjust the final proof if your kitchen runs warmer or cooler.
Timeline at a Glance
Timeline at a Glance
8:30 AM — Mix dough
9:15–9:30 AM — Finish stretch and folds
9:30 AM–12:30 PM — Bulk ferment (1–3 hours)
12:30–1:30 PM — Pan, dimple, and add cheese
1:30–7:00 PM — Final proof (5–6 hours)
6:00–6:30 PM — Preheat oven to 500°F
7:00–7:30 PM — Bake and serve
Ingredients
- King Arthur Bread Flour: 182 g
- All-purpose flour: 56 g
- Salt: 5.1 g
- Sugar: 5.3 g
- Instant yeast: 0.2 g
- Sourdough starter (100% hydration): 73 g
- Water: 166 g
- Extra virgin olive oil: 11 g, plus more for the pan
- Butter: for greasing the pan
- Low-moisture mozzarella: 8 oz cut into roughly 1/4 inch cubes to press into the dough prior to final proof, plus as much as you want to add after the pre-bake.
- Toppings of your choice—Pepperoni is a classic but go with whatever you want. Because of the pre-bake, this pizza is hard to overtop.
- Sauce: when I use sauce, I lightly cook crushed Bianco DiNapoli Tomatoes, with salt, a pinch of sugar, garlic, and oregano.
Hydration: ~73.8%
If your starter is 100% hydration like mine, it contributes roughly equal parts flour and water, about 36.5 g each. That puts total flour at ~274.5 g and total water at ~202.5 g, for a true hydration of about 73.8%. The dough will feel wetter than that number suggests because about a third of the total flour is lower-protein (the 56 g of AP in the recipe plus whatever AP or whole wheat is in your starter—mine is a 50-50 blend), and lower-protein flours absorb less water than bread flour. In terms of handling, expect something closer to a 76–78% bread-flour dough.
No Starter Variation
If you don’t have a sourdough starter, increase the all-purpose flour to 96 g (56 g + 40 g) and the water to 202 g (166 g + 36 g) to replace the starter’s flour and water contributions. Increase the yeast to 2-3 g, but be aware that you need to watch the dough more carefully during the final proof; you may need to bake an hour or two earlier than the sourdough version. The dough is ready when it has more than doubled in the pan after dimpling, looks puffy and airy, and shows visible bubbles. You’ll lose some of the flavor complexity that the starter provides, but the structure will still be there and the crunch may be even better.
Instructions
- The night before: Feed your starter so it’s active and peaked or just past peak by morning.
- Mix the dough. Combine the yeast, starter, and water in a large bowl. Stir until the starter is fully dissolved. Add both flours and mix until you have a rough, shaggy mass — stop just before the dry and wet ingredients are fully combined.
- Rest 5 minutes. This short rest lets the flour begin to hydrate before you add the remaining ingredients. (Note: this isn’t a true autolyse, since the levain and yeast are already in the mix, but the rest serves a similar purpose.)
- Add salt, sugar, and oil. Stir and knead in the bowl for 1–2 minutes until everything is incorporated. Then stretch and fold the dough over itself 8 times, rotating the bowl so all sides get stretched evenly.
- Stretch and fold 3 more times. Wait 5 minutes, then repeat the stretch-and-fold process. Do this a total of 4 rounds, with 5-minute rests between each. Wetting your hands helps with the stickiness, though it’s still a messy dough.
- Bulk ferment. Cover the bowl and let the dough rest at room temperature for 1–3 hours. At around 69°F, I usually give it about 2 hours. The dough should look slightly puffier and feel lighter, but it may or may not have doubled. The bulk ferment is not critical. What really matters is the in-pan rise.
- Prepare the pan. Grease a Detroit-style pan (I use a LloydPans 10×14 inch) with a thin coat of butter, then add a generous amount of EVOO and spread it across the bottom and up the sides.
- Pan the dough. Turn the dough out into the pan. With oiled fingers, gently dimple the dough toward the edges. Don’t stretch it—let the dimpling do the work gradually.
- Dimple in stages. Wait 20 minutes, then dimple again. Repeat once or twice more, waiting 20 minutes between rounds, until the dough reaches the edges and corners of the pan.
- Add the cheese. Sprinkle cubed cheese evenly over the surface and press the cubes gently into the dough. Make sure to push some cheese right up to the edges of the pan—this is what creates the caramelized cheese crust (frico) that defines Detroit-style pizza.
- Final proof. Cover the pan loosely and let it proof at room temperature for 5–6 hours (at 69 °F). The dough should rise significantly and look visibly puffy, with bubbles showing sporadically. It should look pillowy and delicate. I push this proof as long as I can without overproofing, because I find it makes the finished crust lighter and more open. If your kitchen is above 75°F, start checking earlier—you may only need 3–4 hours.
- Preheat the oven. Set the oven to 500°F at least 30 minutes before you plan to bake. Place a rack in the lower third. If you have a pizza steel, try placing the pan directly on it—it conducts heat into the bottom of the pan and can significantly improve bottom crust crunch.
- First bake (crust only). Place the pan in the oven with the cheese you added earlier in the dough but no other toppings. Bake for 4–6 minutes, rotate the pan, and bake another 4–6 minutes. You’re looking for the crust to set and the cheese to begin browning at the edges.
- Add toppings. Remove the pan from the oven. Add additional cheese, pepperoni, or whatever toppings you like—but do not add the sauce yet. (Adding toppings at this stage, rather than before baking, lets you pull the pizza when the toppings are just right, without having to overcook them to ensure the crust is done underneath.)
- Second bake. Return the pan to the oven for 3–5 minutes, rotate, and bake another 3–5 minutes. Watch it closely. This is where you get to decide when the toppings are done just the way you like them. I prefer the second layer of cheese to be just starting to bubble when I pull it.
- Rest and serve. Remove the pizza from the oven and immediately transfer it from the pan to a wire cooling rack (this keeps the bottom crust from steaming and losing its crunch). Let it rest for at least 5 minutes before slicing. Top each slice with warmed sauce and serve.