Ratings, percentages, and more
rating: 8/8 slices

hydration: 73%
difficulty: not hard

Ingredient percents
| Ingredient | Standard % | Baker’s % |
| Flour (300g) | 56.18% | 100% |
| Salt (9g) | 1.69% | 3% |
| Yeast (5g) | 0.09% | 1.67% |
| Water (220g) | 41.2% | 73.33% |
| Olive Oil (0g) | 0% | 0% |
Summary
- Can make in one day.
- High reward to effort.
Recipe available on Serious Eats
Intro
Detroit pizza has been having a moment over the past few years. I’d heard about but had never tried it until I bought an Outsiders Pepperoni Cups frozen pizza at my local grocery store. This was before I’d gotten into making my own pizza, of course. The Outsiders pizza was unquestionably the best supermarket frozen pizza I’ve had. When I decided to start making pizza for myself, I remembered the Outsiders pizza and decided to give Detroit style pizza a try.
The only high sided dish I had was a glass casserole pan, so I went for the pan recommended on the recipe page. The pan is aluminum. If you read the comments, you’ll find that some people think it’s morally wrong to use an aluminum pan for Detroit pizza, but I love my pan. It produces excellent, crisp crust, crunchy cheese edges, and is pretty non-stick much, without any need need for seasoning. Also, according to pizza expert Peter Reinhart, aluminum, steel, or glass can all work for this type of pizza. Yes — Glass, you read that right. (To be fair, Reinhart recommends aluminum and steel over glass.) Jumping off on a slight tangent, I tried using a glass casserole dish for a different Detroit style pizza recipe. It did not turn out well. To help myself remember this important lesson, I created this saying,
“Aluminum or steel, invite me to your meal! But if it’s baked in glass, I’ll have to pass.”
The Serious Eats recipe has a link to brick cheese, which I didn’t buy. I can’t say if it’s worth it or not since I haven’t tried it. But I will say that the combo of cheddar, Monterey Jack, and mozzarella is delicious.
This is my wife’s favorite pizza since I started this process. That helps its rating as I value her opinion and do get joy when others enjoy what I make.
Cooking
One thing I love about this pizza is that you can make it all in a day and still end up with an exceptional pizza. Since I don’t have a stand mixer or food processor, I followed the instructions to make by hand, which took about 15 minutes. After that it’s only a 2-hour rise until your panning it, which includes a 30-minute rest. You also have to make a sauce and bake it. Still, I’d say that the recipe’s facts are pretty close, about 45 minutes of active time and a total of 4 hours from start to finished product.
I’ve made this several times and the only modifications I make are thinner pepperonis for more complete coverage and sauce over everything, plus the recommended sauce strips. I’ve also always baked it on the lowest rack in my oven, not the bottom of the oven. But this is because I didn’t read the recipe intro and, consequently, didn’t realize baking on the bottom of the oven was recommended.
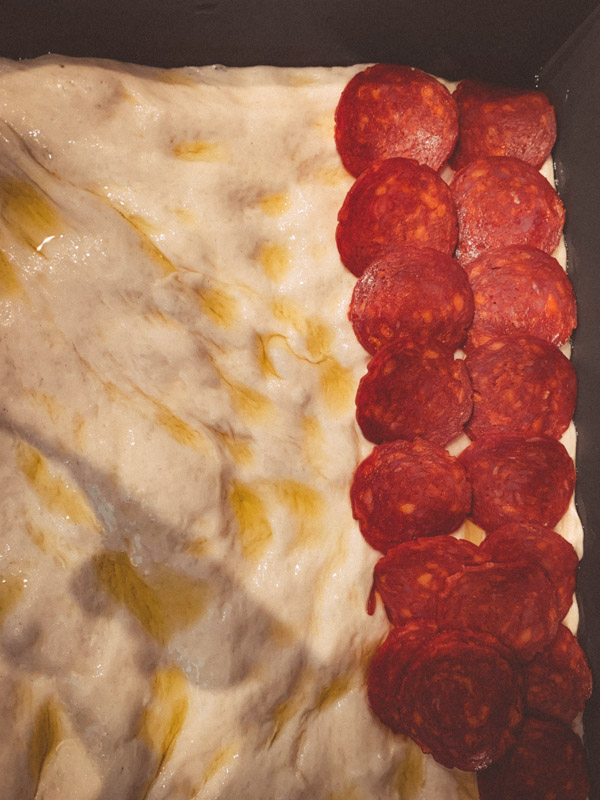
My thin sliced goes down first. The advantage of thinner pepperoni is that I can cover the entire pizza — see below. I think this helps protect the crust a little more from the sauce’s moisture and makes sure every piece has plenty of pepperoni. The downside is that it does make it a little harder to cut as you’re almost sure to hit a row of pepperonis.
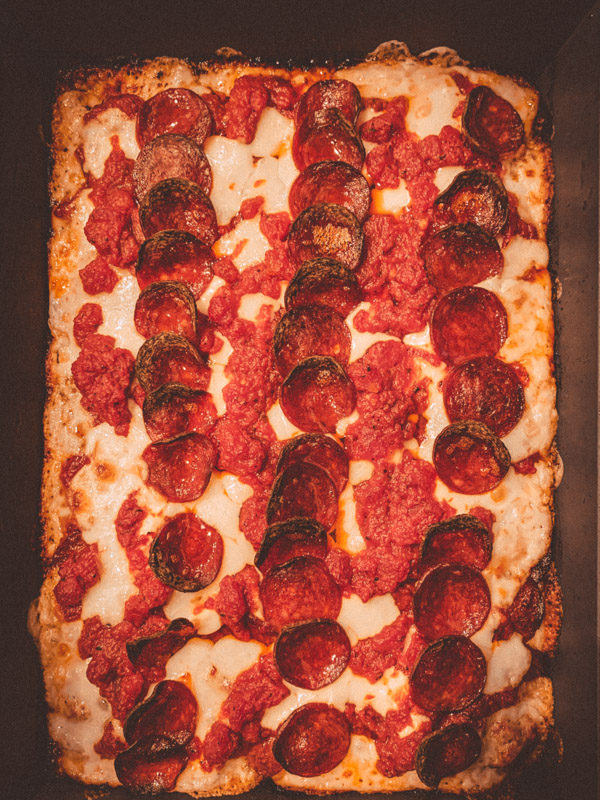
I love sauce and didn’t like the idea of sauceless bits, so I spread sauce carefully over the entire pepperoni layer. Then I add the cheese chunks and finish with strips of sauce and lines of pepperoni (see photo below). For even distribution of the cheese varieties, I keep each cheese separate and spread them out evenly one variety at a time.
I always try to align the strips to where I wanted to slice the pizza. I think it helps a little, but it’s still challenging to cut through the layer of pepperoni under the cheese.
My oven maxes out at 500. I usually cook the pizza for about 15-16 minutes on the bottom rack. I don’t have a top heating element, which I think is good here as it gives the thicker crust a little more time to cook before the top burns (of course, you do want some browning, and even blackening around the edges and corners with the cheese).
Eating
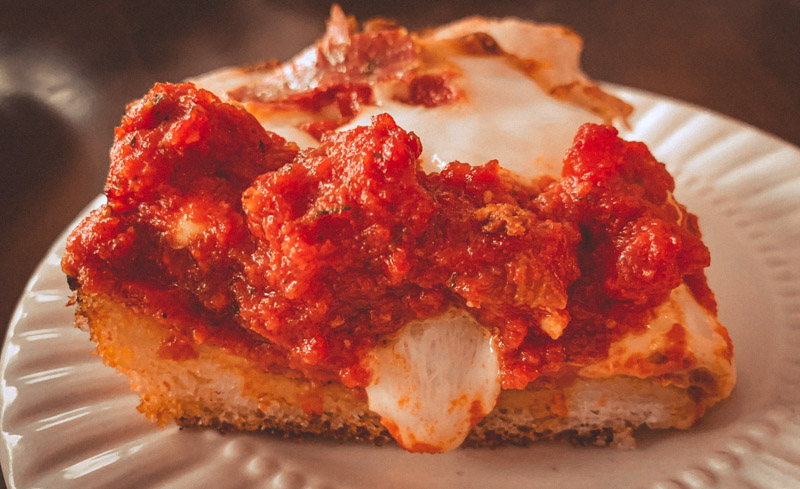
What’s not to like? It’s a crispy, oil fried crust loaded with cheese and pepperoni. Although I’ve never eaten it in its birthplace, Detroit style pizza is known for the crispy, slightly burned edges and corners of delicious cheese. These really are the best parts in this recipe and add a nice contrast to the softer middle portions of the slice.
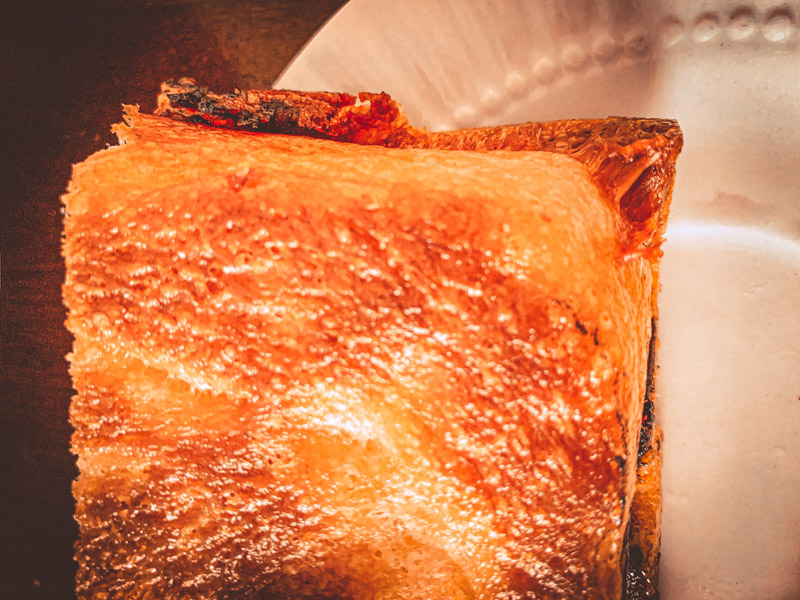
And check out the bottom of the crust! Reminds me a little of the old school Pizza Hut pan pizza, with its rich, oily crust. But, if you really want to relive Pizza Hut, I’d recommend this recipe instead. (Future plan — make the Pizza Hut crust in the Detroit pan with cheese to the edge and Detroit level toppings!)
As soon as you slice the pizza, try to put it on a cooling rack to prevent the crust from sitting in its juices and losing it’s crisp.
One note: Big chunks of sharp cheddar can seem a little out of place when you bit into a group of them, so I sometimes make this with just mozzarella and Monterey jack. If you use cheddar, go for a mild version and keep the cubs small.
Day Two Reheat
The crust gets even crispier and better on the second day! I put oil in the tinfoil I’d stored it in, then push the tinfoil tightly against the cut side to keep the cheese from oozing out while the pizza warms. I reheat at 450 for 9-11 minutes but you could probably go a bit longer.
Cold
The flavors are more distinct when you eat this pizza cold. I also have a soft spot for cold pepperoni. I think it stems from a memory of having cold pepperoni pizza with my grandfather, early in the morning before going out birding. So, I always like cold pepperoni, but I’m not sure it’s for everyone. Still, I’d say this recipe is best hot.
From the Comments
People suggest various alternatives to the recommended brick cheese. Overall, people seem very opinionated about this recipe and have a range of recommendations to make it more “authentic.” Here are a few examples. Several other commenters recommend various other pans. I love the recipe recommended pan. It’s hard to imagine how it could be improved on, but I am a little curious if there’s a difference between my pan and a naturally seasoned steel pan.
Some people complain about the dough being too wet or salty. I had no issues but did see that some of these complaints indicate they did not weigh the ingredients. I recommend weighing the ingredients. If you don’t have a scale, maybe try a different recipe as this one doesn’t appear to be written for someone without a scale — i.e. “about 2 generous cups” of flour. What’s a generous cup?
Wrap Up
Get a pan. Make the recipe.